
Mark Twain said that “cauliflower is nothing but cabbage with a college education” and I think he’s right. Cauliflower is part of the cabbage family, but it has a nutty, sophisticated flavor that sets it apart from its broccoli and cabbage cousins.
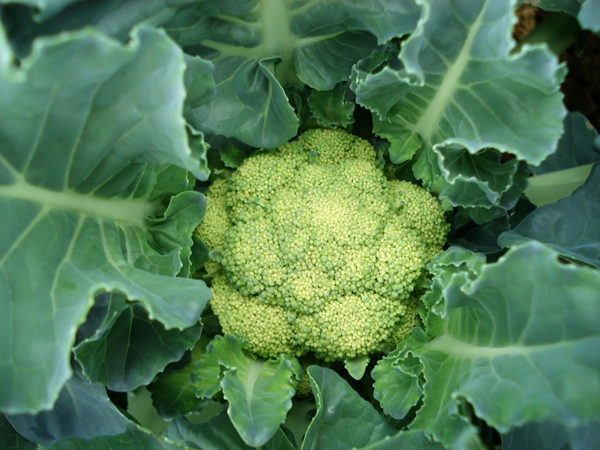
While the attractive vegetable is a popular addition to dinner plates, it takes a little extra care in the garden. That’s because it’s one of the more finicky brassicas. Temperature fluctuations and other stressors can cause growing cauliflower heads to become discolored, disjointed, and unappetizing.
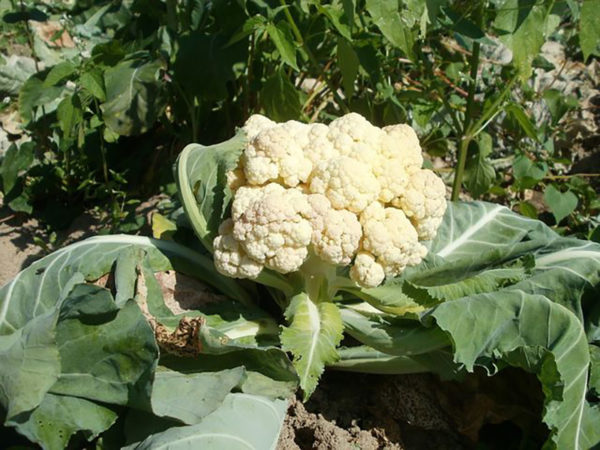
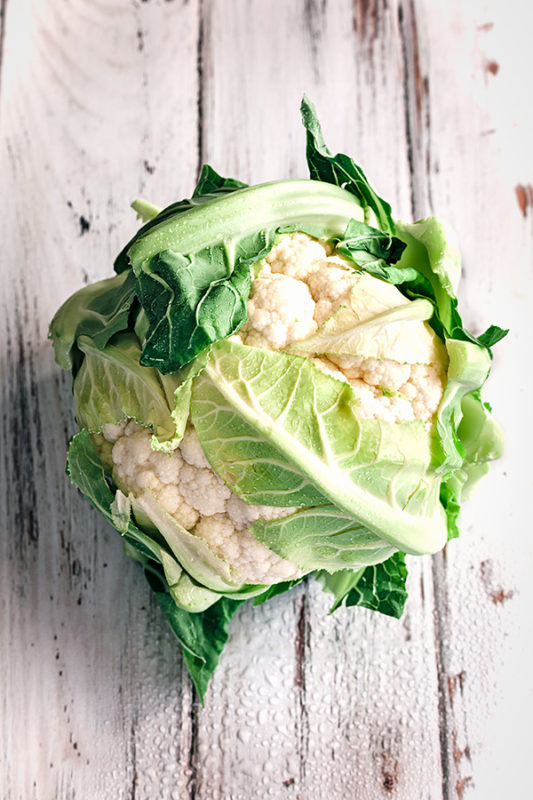
Don’t let the challenges put you off. With a little bit of trial and error, you can grow picture-perfect versions of this persnickety veggie. It’s all worth it in order to harvest a vibrant white (or green, or orange, or purple) head of cauliflower.
So why go to the trouble? Because cauliflower is endlessly versatile in the kitchen – there are countless recipes for you to try! It can be mashed, roasted, or riced. You can add it to soups, stews, and curries, or pair it with meat. Cauliflower can be a meal all its own since you can use different spices to change its entire flavor profile. Is there anything this lovely little cole crop can’t do?
We’ll show you what you need to know, including which varieties to choose for your area, to overcome the challenges and get your cauliflower to prosper.

Cauliflower Varieties

Wondering which cauliflower varieties are best for your climate and situation? Here are a few of the most commonly available options:
- Goodman – An early type of cauliflower that produces small, uniform heads. It has a delicious, nutty flavor and tender florets.
- Steady – A meaty variety suitable for a variety of climates. The large external wrap leaves help protect the dense white head by naturally wrapping around it, so you don’t have to do it manually.
- Cheddar – Looking to add color to your garden patch? This orange variety contains beta-carotene, just like carrots. It’s an early type, maturing in 58 days. The orange florets turn even more vibrant when cooked.
- Minuteman – A hybrid that matures even earlier than the Goodman variety. It is ready in 51 days, which makes it perfect for the impatient gardener or if you’re trying to harvest before it gets hot. It’s snow white heads average over 2 pounds, so you get a lot for your effort.
- Freedom – Another hybrid that does well throughout the season in cool or warm weather. Wrapping isn’t required since this plant self-wraps.
- Amazing – For the gardener who continues to encounter problems growing this vegetable. Heads are harvestable at any size. Leaves wrap around without intervention from the gardener.
- Basileo – This is a hybrid green cauliflower variety best for a summer harvest because it matures quickly. Perfect if you live in an area with a cool spring and hot summer.
- Snow Crown – A good variety for beginners that has an excellent flavor. Easy to grow and matures quickly. It’s also disease resistant.
- Orbit – This is a romanesco type of cauliflower with spiky green florets. It has a slightly nuttier taste than traditional cauliflower. Orbit prefers cooler temps.
- Graffiti – Graffiti has an intense purple head that will add an unusual color to your meal. It’s heat tolerant and matures in 70 days. It turns blue when cooked.
Planting Cauliflower
Before we get to the nitty-gritty regarding cauliflower care and maintenance, let’s start with the basics on how to start and plant this cruciferous veggie.
Zones
Cauliflower is hardy in zones 7-10.
When to Plant Cauliflower
It depends on the type of cauliflower, but some varieties do best when planted for a fall harvest in warm areas since cauliflower prefers a cool-season growing period.
For summer varieties: Transplant starts in the early spring, before the last frost. In my region, that’s around when the soil begins to warm. So plan on planting seedlings indoors 3-4 weeks before the last frost.
For fall harvesting: To start indoors for fall harvesting, count backward from your first frost date, leaving a minimum of 6-8 weeks for your cauliflower to grow.
Sunlight and Temperature Requirements
Cauliflower requires lots of sunlight to thrive. It needs at least 6 hours of direct light. But this crunchy cool-season vegetable does best when the environment remains cool – around 60°F. If you live in a cool area, you’re in luck, but this requirement can be tough for home gardeners in hot areas.
If you live in an area with hot summers, plant varieties like Snow Crown, Amazing, Cheddar and Graffiti, which can handle a little heat. In the Deep South, grow indoors and then transplant after the hottest part of summer is past.
Soil Requirements
Cauliflower likes well-drained soil with a pH between 6.5 and 6.8. Add lots of organic matter to your soil.
Transplanting
Transplant seedlings 2-3 weeks after the last frost date. This isn’t a good candidate for containers, so keep your cauliflower in beds. The plant needs room to grow.
Spacing Cauliflower
Proper spacing is important with all plants, but especially with cauliflower. Crowding the plants will leave you with stunted, headless versions. Crowding also encourages a range of diseases and pests. Square foot gardeners should plan on one plant per square foot. Row gardeners should plant them 18-24 inches apart with 30 inches between rows.
Expected Germination Time
Germination time is similar to cabbage seeds. Sprouts will appear in about a week in ideal conditions.
Caring for Your Cauliflower Plants
Watering
Cauliflower likes water, so don’t let the soil dry out. This can interrupt the growth of the head. Mulching can help you achieve consistent moisture levels. Aim to provide 1 to 1.5 inches of water per week.
Temperature
The challenge with cauliflower is that, like eggplant, it’s not tolerant of temperature fluctuations. Steady growing conditions are necessary, but you can’t control the weather. This makes it tough to grow cauliflower in areas with hot summers.
Cauliflower that gets too hot can experience “buttoning,” which is where the plant forms several small heads instead of one large one. Even though it prefers cooler temps, a deep freeze will damage the plant. Keep all this in mind when choosing a time and type of cauliflower to grow.
For success, you’ll need to try as best you can to control the growing conditions of your cauliflower. It shouldn’t be too hot or too cold. To prevent frost damage of spring transplants, use row covers or cloches for protection. To avoid heat stress in the summer, use a shade cloth.
Fertilizing
Cauliflower is particularly finicky about magnesium levels, so keep an eye on them. Side-dress with nitrogen about halfway through the growing season.
Rotation
Crop rotation is crucial for avoiding pests and diseases. Cauliflower is a brassica so avoid planting where you last put plants like broccoli, kale, or cabbage.
Succession sowing
Stagger your seed starting from March to mid-summer and set out transplants in succession. You can also choose varieties with different maturity dates.
Additional Tip
Don’t forget that some varieties may require you to blanch the head of cauliflower. Unshaded, some heads may become discolored. The process of shading helps keep the head bright white. Some varieties are capable of self-shading, however.
To blanch cauliflower heads, wrap the leaves around the head of the plant and secure them with twine. Open them periodically to check for pests and to see how the plant is progressing. They should also be opened after heavy rain so they can dry out.
Cauliflower Problems and Solutions
Problems
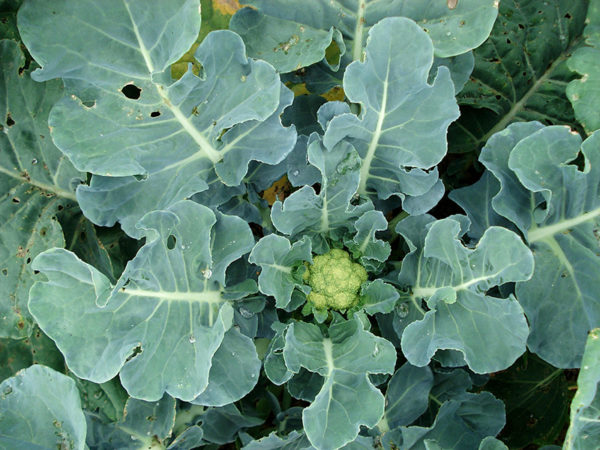
- Small heads – Growth may slow due to nutrient deficiencies. Small heads may also be the result of unstable growing conditions. Keep your plants well-fed.
- Non-uniform heads – If temperatures fluctuate too much, cauliflower heads may not form properly. Use crop covers when temps are moving to extremes.
- Discoloration – If heads are exposed to direct sunlight, they may become discolored. Be sure to wrap growing cauliflower heads.
Note that if heads are irregular and the plant is already sizeable, it may not be possible to correct the issue. If you’re growing for home consumption, though, a weird looking cauliflower plant isn’t something you should throw into the compost. Wash and check for pests and enjoy it for dinner regardless of its weird appearance.
Cabbage Worms
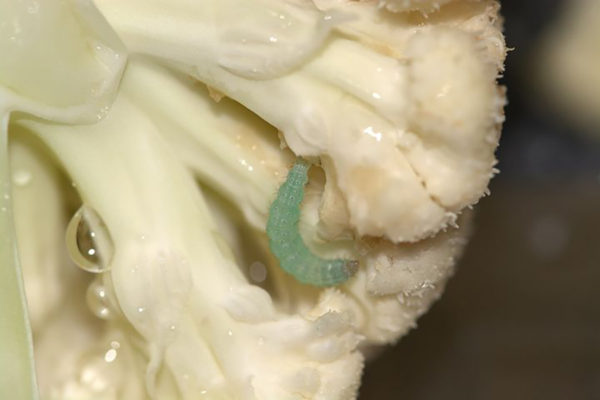
Cabbage worms are the bane of my existence. They’re evil little things! They’re most active later in the growing season and populations grow quickly, which can wreak havoc on a cauliflower crop. They chomp on leaves and burrow into the heads, leaving behind fecal pellets.
The best way to prevent an infestation is to cover growing cauliflower plants and by keeping natural predators around like the larvae of Trichogramma wasps, spiders and yellow jackets. You can also spray plants with a tansy oil mixture to discourage them from coming around. Or you can plant tansy nearby.
If cabbage worms end up on your plants, pick them off and destroy them.
If you get desperate, Bt (Bacillus thuringiensis) is a biological insecticide that won’t harm desireable garden inhabitants. You can also use spinosad-based sprays.
In the fall, get rid of overwintering pupae by tilling your garden.
Cabbage Root Maggots
Cabbage root maggots are as gross as they sound. You might not even know your plants are affected until they brown and die. These pests munch on the roots of cabbage-family plants. If you see flies around your cauliflower, look for eggs in the soil and destroy them. Use cabbage collars on stems and put sticky traps around the garden to catch them.
Cabbage Aphids
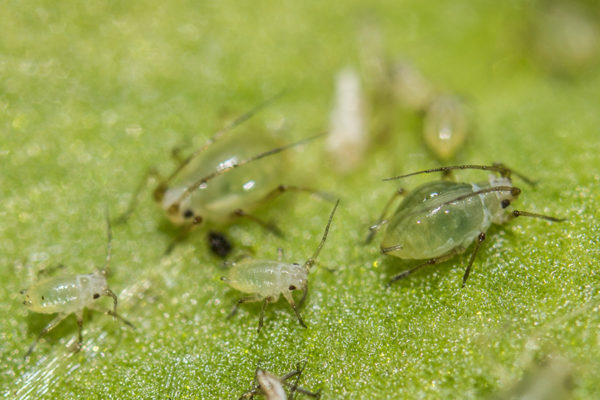
Cabbage aphids are easier to deal with than the above-mentioned pests. These little bugs are a nuisance but can be evicted with a strong flow of water from the hose. Reflective mulches can help keep populations under control, but if things get really bad, you may want to resort to neem or canola oil.
Cabbage Looper

The cabbage looper can eat three-times its weight a day in plant matter, so you don’t want to let this critter reproduce in your garden. They’re easy to recognize by their movement, which involves bringing their rear up to meet their front in typical inch-worm fashion. Drown the worms in soapy water if you spot them on leaves. If they get bad, use spinosad or BTK spray to control them. Prevent them with crop covers and by planting crops of parsley, dill, fennel, and coriander nearby, which attract predators that eat cabbage loopers.
Cauliflower Mosaic
This virus is usually spread by aphids. Once your plants get it, there’s no cure. Toss infected plants and disinfect your tools. Since it’s spread by pests, keep them out of your garden. Keep weeds under control, because they can harbor the critters that spread the disease.
Clubroot
Clubroot is caused by a soil fungus. It causes slow-growing cauliflower heads and wilting leaves. It can survive in the soil for over a decade. The best way to avoid this disease is to choose resistant varieties and rotate crops regularly.
Black Rot

Black rot is another potential disease that can harm your growing cauliflower plants. The first signs manifest as leaf lesions. Crop rotation and proper sanitization of seed starting tools will help prevent it. You can also plant resistant varieties if you struggle with this bacteria.
Bacterial Soft Rot
This bacterial disease causes plants to develop mushy, discolored spots that can erupt with a slimy liquid. There’s no cure, so remove and destroy any infected plants. To avoid it, keep cauliflower well spaced to allow air circulation since the bacteria thrive in warm, moist conditions. Plant cauliflower in raised beds with well-drained soil and make sure your earth has the right nutrients to keep your cauliflower healthy enough to resist.
Blackleg
Blackleg is a fungus that attacks cruciferous crops. You’ll notice lesions on your plant that turn black over time. It’s particularly common in areas with rainy, wet climates. To prevent it, control weeds, rotate crops and space plants adequately. Make sure you are using disease-free seed or treat seeds with hot water prior to planting.
Downy Mildew
Downy mildew attacks plant leaves, and you’ll know you have it when you spot powdery white masses on your cauliflower. Don’t water plants in the morning when the spores are released. Keep plants spaced for good air circulation and rotate crops each year. Choose resistant cauliflower strains.
White Rust
This fungus will cause chalky white spots on plants and will cause your growing cauliflower to become deformed. Till your soil in the fall and rotate crops to prevent it.
Powdery Mildew
Powdery mildew makes your plants look like they’ve been dusted with flour at first, but it can quickly damage an entire crop. You can use neem oil or other organic fungicides to treat it, but prevention is best. Avoid overhead irrigation and plant resistant cauliflower varieties. Remove all plant debris at the end of the year and be sure to rotate your crops. Avoid excessive nitrogen application.
Ring Spot
Ring spot is a fungus that attacks cole crops. It’s spread by wind, water or can live in seeds, and can overwinter in the soil. It looks like dark spots in plant leaves, and the entire plant can eventually turn black. Rotate out brassicas every year and keep up on weeding to prevent it from spreading. You can also use a copper spray.
Damping Off
Damping off is most common in young plants and seedlings. It can be a fungus or a mold and, if you’ve ever had it before, you know it can kill off an entire crop in no time. The best method of control is prevention. Use sterile soil, pots, and tools when planting seedlings.
Beet Armyworm
The beet armyworm is a major pest in southern areas. They eat irregular holes in plant leaves and can eventually skeletonize a crop. If you catch these caterpillars early, you can pick them off and destroy them. If your infestation gets bad, try spinosad to kill them off. Help control them by encouraging predators to visit your garden.
Cucumber Beetles
If you notice holes being nibbled in your cauliflower leaves, keep an eye out for cucumber beetles. These spotted, or striped pests like to feed on seedlings, and they carry viruses and bacteria with them as they go. Use sticky traps to capture them and cover your seedlings with row covers.
Cutworms
Cutworms can destroy growing cauliflowers quickly, especially when plants are young. Control weeds around your plants, hand-pick any larvae you spot (this is easiest to do at night). Use spinosad or rosemary essential oil to keep them away. You can also sprinkle diatomaceous earth around plants.
White Mold
Also known as Sclerotinia stem rot, you’ll know you have this when you see irregular white-gray lesions on leaves and stems. Rotate crops, control weeds and give plants plenty of space when planting. Destroy infected plants.
Diamondback Moth
Diamondback moths can be devastating. They are resistant to insecticides, reproduce rapidly and have few natural enemies. Use trap crops like mustard and collards to suppress populations, and be sure to rotate your brassicas.
Flea Beetles
These tiny beetles feed on plant leaves, while the larvae attack roots. You’ll notice little shotholes in leaves, and while they won’t necessarily kill a plant, they spread bacteria that can. A mixture of 4 parts water, 2 parts rubbing alcohol and 1 part dish soap can effectively control them. You can also dust plants with talcum powder or use sticky traps. Be liberal with your mulch to prevent beetle larvae from reaching the plant.
Root-Knot Nematode
This nematode can cause serious damage to your growing cauliflower crops if left unchecked, stunting growth and causing leaves to wilt. They feed on the roots of plants and cause knots to form in the root system. Crop rotation is the best way to avoid them, and you can also select resistant varieties. Solarize your soil if you find them in your garden.
Thrips
Thrips can damage leaves, but the real risk is that they spread disease. Use reflective mulch to keep them from landing on your crops, and don’t plant cauliflower next to onions or garlic.
Companion Planting for Cauliflower
Best Companions
Cauliflower does well next to herbs such as:
- Rosemary
- Sage
- Dill
- Mint
- Thym
- Sage
- Tansy
It also does well next to fruits and veggies like:
- Broccoli
- Brussel Sprouts
- Beets
- Cucumber
- Beans
- Celery
- Radish
- Corn
- Spinach
- Chard
Worst Companions
Harvesting & Storing Cauliflower
Harvesting cauliflower involves cutting off the entire head from the base of the plant. You’ll need a sharp straight knife to make the cut. Once the plant has been harvested, it’s done.
I tend to harvest the larger heads first since they’re an attractive food source for critters like garden bunnies. If I’m feeling generous and have a plentiful store of veg in the fridge and pantry, I leave the smallest heads for the rabbits once winter comes along.
Storage
Harvest once you need it since this vegetable doesn’t keep for too long. Expect it to stay fresh and good to eat for about a week in the fridge. You could cut it up and freeze it for soups and stews, but I always prefer to eat it fresh if I can.
You can also pickle it.
Growing cauliflower is a worthwhile challenge because they are so wonderful in the kitchen. Have you ever grown cauliflower? Did you find it tough to grow? Any tips for other gardeners you’d like to share? Let us know in the comments!


