For many years I stuck to growing plants from seed that were easy to germinate. But, as I started getting into more exotic perennials, I kept coming across instructions to stratify seeds.
Honestly, at first, I didn’t even know what that meant. So, I ignored the instructions. Sadly, very few of those seeds sprouted. After wasting both time and money, I finally decided to get to the bottom of this seed stratification stuff.
Turns out it’s not really that complicated to do. Plus, it’s a lot easier to be successful at it if you understand why some seeds need stratification to germinate and what conditions will produce the best results.
Let me share with you some of the things I learned in my quest to comprehend seed stratification.
What is Seed Stratification?
Seed stratification is basically a trick we play on seeds to make them feel like they have survived winter. By putting the seeds in the refrigerator or outside in cold weather, for a certain period of time, we simulate the experience of winter.
Then, when we remove the seeds from the cold and transfer them to a warm location, they believe it is spring. After enough time in warm soil, following that cold period, the seeds will germinate.
Why Stratify?
Now, that’s the basic definition of seed stratification, but there’s a lot more to know to get it right. For example, why does nature make some plants dependent on stratification and not others?
The short answer is survival.
Hot Climate Plants
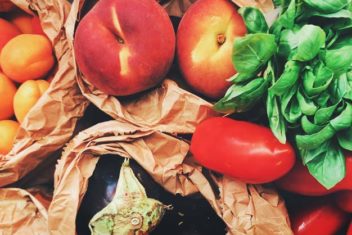
Plants like tomatoes, peppers, basil, amaranth, and okra evolved in hot climates with no harsh winters. As such, in their native climates, even if those plants produce seeds in late-summer and germinate right after that, those little seedlings aren’t at risk of dying at first frost.
Since hot climates don’t have winter weather to worry about, plants can just keep on growing year-round. They can make more seeds and start again at any point. So, seeds from plants that originated in hot climates don’t need stratification.
Some of them may require scarification, which is basically another way to help seeds break dormancy. Some hot climate seeds may also require long periods of moist, warm treatment to stimulate germination. However, stratification – alternating cold then warm temperatures – is only necessary for cold-hardy plants.
Cold Climate Plants
For plants that evolved in places with cold winters, having seeds germinate in summer with the first frost right around the corner might mean that the plant does not get to survive long enough to create more seeds. So, rather than have seeds germinate when they can’t possibly survive their native conditions and produce more seeds, nature built in a safety mechanism.
That safety mechanism – the requirement that the seeds experience winter before they germinate – ensures that the seeds won’t sprout until they have a reasonable chance at surviving to make more seeds.
Global Seed Exchange
That system of making some seeds dependent on stratification is awesome if you only grow those plants in the climate they evolved in. However, we gardeners like to buy seeds from plants that evolved around the world and grow them in our very different environments. We also like to grow them when we want them even if that’s not when nature designed the seeds to germinate.
To grow plants where and when we want them, we have to employ tricks to make sure those seeds sprout. That’s where seed stratification comes in.
Methods of Stratification
There are two primary methods of stratification. They are dry and moist stratification.
Dry Stratification
For dry stratification, you simply need to place your seed packet in the fridge, or occasionally the freezer, for a few weeks to months. Seeds that benefit from this method are often adapted for dry soils or dry winters.
Cold hardy perennial grasses and desert plants often require dry stratification for good germination rates. To determine how long to dry stratify, research the plant’s native climate and try to approximate those conditions in your fridge and freezer.
Moist Stratification
For moist stratification, your seeds must maintain contact with a moisture-retaining medium for weeks to months. Most homestead-grown plants that have stratification requirements need cold moist treatment. So, we’ll focus on that for the rest of this article.
Seeds that Need Moist Stratification
I am going to give you a few basic concepts to help you identify which seeds might need, or benefit from, moist stratification. Now, there are exceptions to every rule so these clues won’t work every time. But, this will give you a good start.
Type 1: Cold Hardy Deciduous or Evergreen Perennials
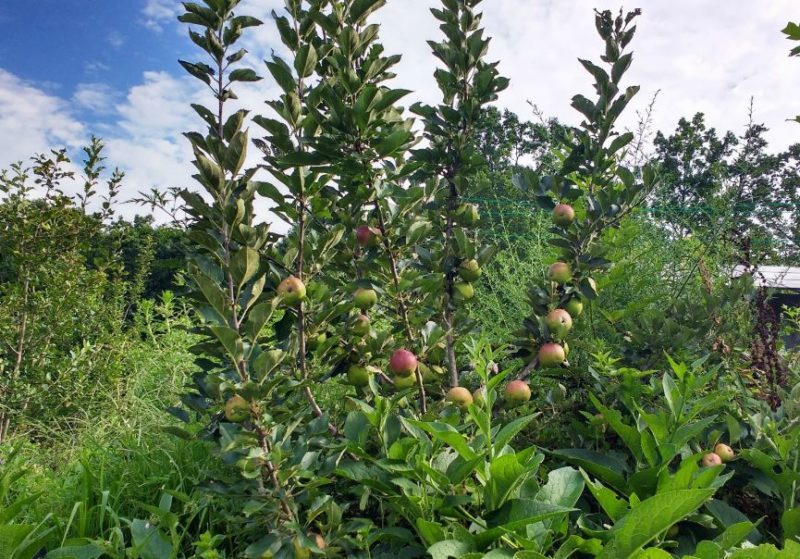
Seeds from perennial plants that 1) can withstand freezing temperatures and 2) have some above-ground plant parts that do not die back to the ground in winter tend to love stratification. This includes cold-hardy deciduous, semi-evergreen, and evergreen plants.
– Chill Hours
As an example, seeds from fruit trees that require a certain number of chill hours before they flower: apple, blueberry, cherry, pear, peach, and more require stratification for good germination rates. Whereas seeds from fruit trees that have no chill hour requirements and are not very cold hardy such as lemon, lime, or avocado do not require stratification to germinate (though they may benefit from scarification).
– Temperate Forest Plants
Plants that naturally grow in a temperate forest environment benefit from stratification. Things like oaks, pine, walnut, maple, butternut, holly, ginseng, witch hazel and more all benefit from cold stratification.
– Long-term Stratification
Plants of this type generally need longer cold stratification for good germination rates than the next two types. I generally stratify these kinds of seeds for 8-12 weeks for best results.
Type 2: Self-Seeding, Cold-Hardy Herbaceous Perennials
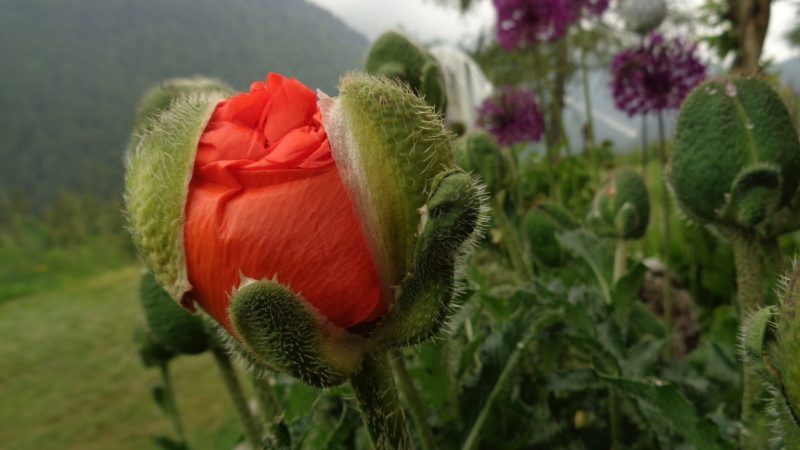
The plants that die completely to the ground and then come up on their own in spring, along with a few newly self-seeded friends, often benefit from cold stratification. Poppies are my favorite example.
– Poppies
I know several gardeners who have tried to plant perennial poppies from seed in early spring with no success. Then, the following year, they’ll get a poppy explosion.
That’s because if you start those seeds when the soil is already too warm, the seeds will simply stay dormant until the following year and get an early start then.
– Exception: Annual Poppies
Note some poppies, such as those grown for their edible seeds, are annuals. Incidentally, they too benefit from cold stratification. (I promised you exceptions didn’t I?)
– Wild Flowers
Columbines, lupines, echinacea, milkweed, and pretty much any perennial wildflower that is cold-hardy and self-seeding by nature also benefit greatly from a period of cold-stratification.
– Herbs
Herbs like oregano, catmint, anise hyssop, and St. John’s wort have improved germination rates from cold treatment too.
– Exception: Perennials Cultivated to Grow as Annuals
Cultivated onions, salsify, chicory, leeks, and more fall into this exception category. They generally benefit from stratification, especially if you are trying to plant them out of season. But, they don’t require it.
Their wild relatives though, still tend to require stratification for good germination rates.
– Medium-term Stratification
With herbaceous, cold-hardy perennials stratification for 4-8 weeks will usually do the job.
Type 3: Cool Season Biennials with Irregular Germination
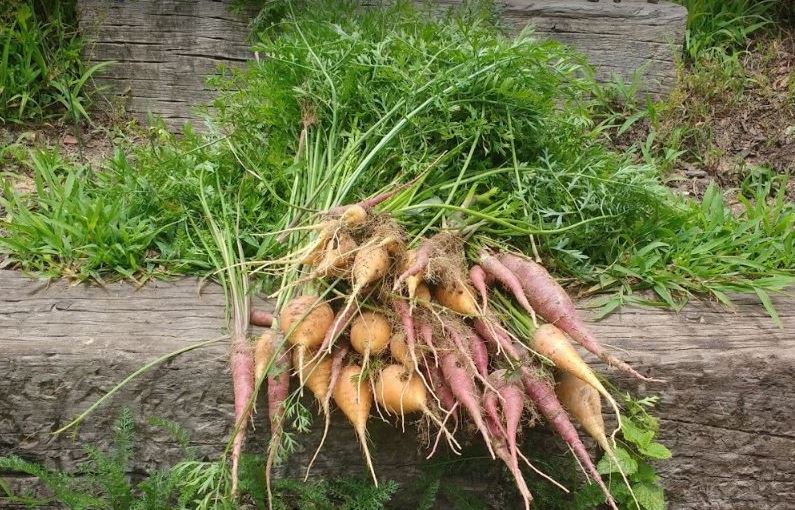
Most cool-season biennial seeds will also benefit from stratification. In particular, biennial seeds that are noted to have “irregular germination” will germinate more consistently with a short period of stratification.
Biennial seeds with irregular germination often have a natural safety feature built-in that delays germination in a percentage of seeds for a few weeks. This is a kind of natural fail-safe against having all seeds germinate at a false start to spring and die from cold.
– Apiaceae or Umbelliferae Family
Examples include vegetables like carrots, parsnips, and celery. Herbs like dill and parsley and spices like Nigella sativa and caraway also respond well to stratification.
– Short-Term Stratification
In this case, you are not trying to trick seeds into thinking they survived a long winter. Instead, you are tricking seeds into experiencing a cold snap and a restart to spring.
As such biennials generally only need a week or two of cold stratification prior to planting in warm soil for good germination rates.
Exceptions
As I said, these are handy guidelines to help you figure out when seeds might need stratification. But, it’s always a good idea to do specific research to find detailed stratification recommendations for the plant you are starting from seed.
Experts at growing certain plants have evolved techniques to improve germination that are more comprehensive than the basics outlined above. For example, growers of Hellebores will tell you that those seeds actually require multiple periods alternating cold and warm stratification for germination.
How to Cold Moist Stratify Seeds
Now that you know why seed stratification is necessary for some plants, and have some leads on when it might be necessary, let’s look at a few methods for cold, moist stratifying.
Option 1: Refrigerator Stratification
The most common method of cold treating seeds, is cold moist stratification by refrigeration. It basically requires wetting some form of medium, putting seeds in a container inside the medium, and then putting the container in the fridge.
Mediums for Stratification
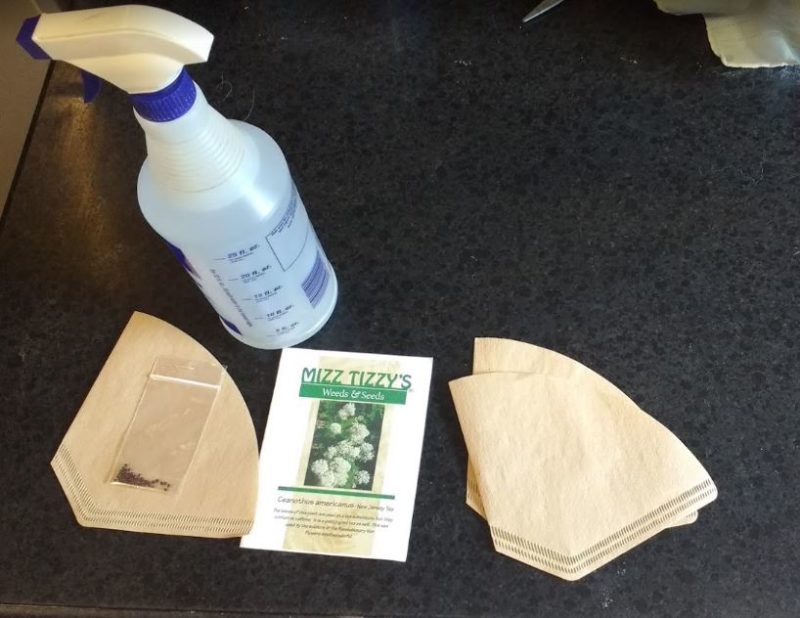
You can wet sand, peat, soil-free seed starting mix, cotton balls, coffee filters, paper towels, or even just use plain old water as your medium. The important part is to keep your medium from molding during your entire stratification period.
– Soil-like Medium
If you are using peat, sand, sterile soil, or soil-free seed starting mix, you want to add only enough water that your medium is moist enough to form into a ball, but not dripping with water. Getting this kind of consistency cuts down on mold potential in these mediums.
– Paper or Cotton Products
When using paper products or cotton balls, use a spray bottle to moisten your medium to the point of saturation; but do not make them soppy. You can also soak and then gently wring these items to give them a good moisture consistency to start with.
– Water
You can also put your seeds in water, such as by filling the bottom of a mason jar or sealed plastic bag. This works well as long as your refrigerator doesn’t get too cold. Check the temperature of the water to make sure it stays above 40° F.
This method often works faster than the others and may result in germination in the water. So you’ll need to keep watch for seedlings. Then, transfer them immediately to warm soil in ideal growing conditions.
Steps for Refrigerator Stratification
Now that you know your options on mediums to use, the basics of how to stratify are the same for all mediums.
Step 1: Add Seeds
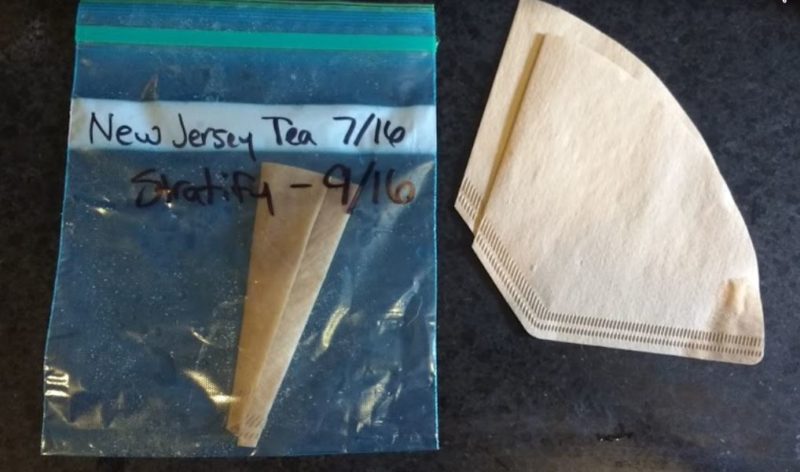
Choose a container such as a plastic sealable bag, plastic container, or mason jar to use for stratification. Cover your seeds with your medium. Then, close the container and place it in the refrigerator.
You can also place your seeds in mesh bags and put those bags in the medium. That way you can stratify several seed varieties in the same container and remove seeds easily for mold maintenance (see below).
For soil-less mediums about 1-2 inches in the bottom of your container is sufficient. For paper, two or three layers work well to ensure consistent moisture. For cotton balls, layer the seeds between the cotton balls.
Step 2: Monitor Moisture
Keep your medium moist for the entire stratification period. You can use a straw, dropper, or spray bottle to gently moisten your medium as needed.
Step 3: Inspect for Mold
The biggest challenge with stratification is keeping your medium from molding. Inspecting daily for any signs of the start of mold is key to saving your seeds from fungal infection.
– Fungicides
Some people will use a fungicide such as Captan in their medium or sprinkled on their seeds to reduce the risk of mold. Fungicides do reduce mold. However, they can also wreak havoc if you are growing plants organically.
Those fungicides penetrate the seed coating and are present in the sprouting seedling. That residual fungicide can limit your plant’s ability to form connections with mycorrhizae in the soil once planted. As such plant performance may be negatively impacted.
– Fresh Air
Personally, I find it better to skip fungicides. Instead, I remove my container from the fridge and open my container daily to let new air in and old air out. In my experience, giving the container a breath of daily fresh air seems to be sufficient to eliminate the risk of mold for as long as 3 months.
– Medium Maintenance
If your medium does show any signs of mold, immediately remove your seeds, rinse them in cool water, and transfer them to a new medium. If any of your seeds are moldy, throw them out.
Step 4: Plant
After your seeds have spent sufficient time in simulated cold weather you can transfer them to your planting medium. When soil reaches the ideal germination temperatures, your stratified seeds will believe spring has arrived and will sprout without difficulty.
Option 2: Outdoor Pot Stratification
If you live in a climate similar to the native climate of your plant, you can also fill a small pot with sterile soil or soil-less seed mix. Then, push your seeds about an inch under the surface to keep birds from accessing them and to limit light.
Keep your pot outside, in a protected, shady location. Because the temperature will not be as consistent in your refrigerator, you may want to allow a few extra weeks for stratification to ensure germination.
Also, similar to refrigerator stratification, you will need to keep your medium moist and mold-free until your stratification period is over. You’ll also want to move your pot to a cool location if you have any surprise hot days and keep breakable pots protected from freezing conditions.
Remove the top layer of planting medium so seeds are just below the surface when you move the pot to warm conditions for germination.
Option 3: Natural Stratification
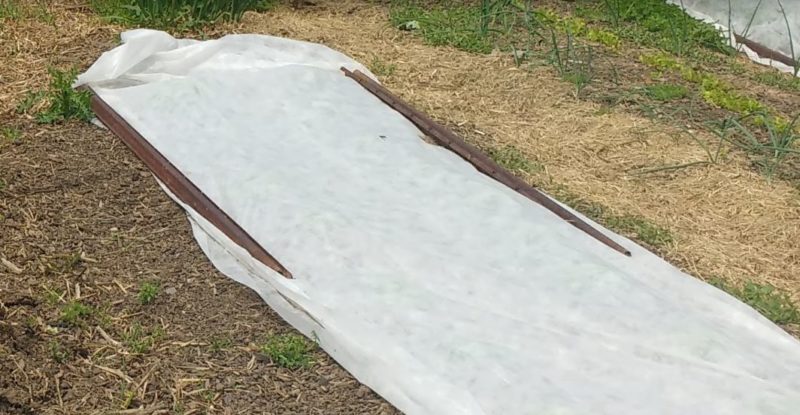
Natural stratification only works if the plants you are trying to grow will germinate naturally in your climate. For example, if you are trying to grow a native wildflower garden, you may want to prepare some soil, scatter seeds in fall, and then let them germinate naturally come spring and early summer.
If you can use natural stratification, you will want to take a few extra steps to make sure you get a good seed survival rate.
– Start in Fall
Refrigerator stratification is extremely controlled. Natural stratification varies by the weather. As such, natural stratification takes longer than refrigerator stratification.
For best results, start your seeds in fall, after the soil has cooled.
– Overseed
Birds, varmint, and soil-borne insects all eat seeds in winter to survive. Most plants put out far more seeds than are necessary for the survival of the species because nature expects many of those seeds to be eaten or not germinate.
So, you’ll want to overseed to make sure at least some of those seeds make it through winter without becoming dinner for something.
– Plant the seeds shallowly
Nature also deposits seeds on top of the soil then allows weather to beat them in. This way the seeds end up at the right depth to experience all the ups and downs of winter and still have sufficient light to germinate when soil temperatures warm up.
You’ll want to duplicate this at home. Only cover the seeds lightly with soil to start. Let nature do the rest.
– Use Row Covers
You may also want to use fabric row covers to protect the plot until germination starts. Row covers can discourage digging animals (e.g. your pet dog) from disturbing the soil and cut down on birds eating your seeds.
You can simply lay the row cover over the soil and weight it down with soil or rocks. By putting the row covers directly on the soil, they’ll provide a bit more moisture protection than those stretched over hoops.
– Water Occasionally
Nature doesn’t water consistently. But nature doesn’t have the same precise germination expectations that we humans have. So, even if you are stratifying naturally, you’ll want to water your seeds and soil during dry periods when the soil is not frozen to help ensure germination in the first year.
Conclusion
Whenever I look deeper I look into the “whys” of gardening, my connection to and appreciation of nature deepens. I also find my skills as a gardener expand much further than if I’d just followed the directions.
Nature is full of incredibly smart tricks and tools to ensure plant survival. The seed stratification requirement is just one of many. I hope this little foray through the ins and outs of seed stratification has helped deepen your wonder at the beauty and underlying intelligence of nature, as it did mine.
May all the seeds planted for your garden, and in your mind, germinate on time and at an incredible rate!

