Raising ducklings is one of the most entertaining experiences you can have on a homestead. Whether you do it yourself in a brooder or let a mama duck do the raising for you, the pleasure of watching ducklings grow far exceeds the work involved.
There are some things you need to know to help ducklings reach maturity safely. Also, there are some easy tips and tricks you can use to make the experience less labor-intensive.
If you are ready to be endlessly entertained by duckling antics and inspired by their natural aptitudes, then read on for an in-depth look at what’s involved in raising ducklings and how to brood them at home.

5 Facts You Need to Know About Ducklings

Those tiny, adorable baby ducklings hatching out of the shell are far more durable than most people think. Yet, they still need specific care to encourage faster development and minimize losses. Here are some fascinating things to know about ducklings to help you get them off to a great start.
(Read our previous article on incubating duck eggs as an introduction to this topic.)
Fact 1: Born Fed
In their final hours of development, the-about-to-hatch ducklings absorb all the remaining nutrients in the shell through their umbilical cord before they pip out. Also, during their growth process, they deposit cholesterol in their livers for later use.
Those stored nutrients allow the ducklings to keep growing after they hatch, even before they find food. So, when you raise ducklings at home, they might not seem to eat much at first. It can take a few days for their voracious appetites to kick in.
Fact 2: Already Waterproof
Ducklings are born with downy feathers that don’t look very waterproof. However, as long as they had good nutrition in the egg (i.e. the duck who laid the egg was fed well), those fluffy, soft feathers are water-ready.
I have had a few ducklings born, or mail-delivered, with health deficiencies. When those ducklings got wet, they never got dry and were prone to get chilled and not gain weight. Healthy ducklings, though, are ready to swim less than 1-2 days after hatching.
Later, as ducklings start developing their structured outer feathers, they’ll also develop an oil gland on their tail area. They’ll spread that oil on their feathers for weather and sun protection. However, the oil gland is not necessary for water-proofing.
Fact 3: Water Access Is Critical
In nature, once all her hatched ducklings are clean and dry, the mama duck’s first order of business is to show ducklings where to find water. She also teaches them how not to drown by making sure they know the shallow points of a pond for easy entry and exit.
On my homestead, mama ducks have their ducklings swimming within the first 24-48 hours of life. I have a rocky runway into a shallow starter duck pond that makes it easy for ducklings to get in and out.
Mama ducks only allow their tiny ducklings to swim for short periods of time, under close supervision. After that, mamas lead ducklings to a warm safe place, out of drafts, to let them preen and dry their feathers.
Mamas generally keep newly hatched ducklings out of the water for several hours between swims. Also, on cold days, they take them foraging away from the ponds to remove the temptation to swim. After a week or two, she lets them be the judge of when to get in and out of the water.
Fact 4: Ducklings Are Weather Ready

In very cold conditions, I’ve seen mama ducks tuck ducklings underneath her belly area to keep them warm for a few minutes. Also, mamas will call the ducklings to brood while a threat is near (e.g. one of our cats or people trying to get a glimpse of the ducklings).
Generally, though, little ducklings tend to duck pile on each other for warmth. They stay near to, but not under mama. It’s almost as if they are staying together just as they did while they were in their eggs in their nest. They even rotate out to in so that the ducklings on the coolest outer edges get to move inward for more warmth periodically.
Fact 5: Ducklings Grow in Good Weather

After a few days when the ducklings start eating regularly, they will grow noticeably larger on warm days. On cold days, they barely grow at all. I’ve weighed my ducklings morning and night just to make sure my eyes weren’t deceiving me. So, I can confidently confirm, weight gain happens mainly in warm weather.
This makes perfect sense. If a duck is expending calories to stay warm, it won’t grow as much. While on warm days when it takes in more calories than needed to be comfortable, it can develop faster.
It’s astonishing to see how quickly ducklings develop in size and boldness in warm conditions. Within a couple of weeks, they already act like aloof teenagers keeping distance between them and their mama. They also charge right up to me, or holler at me, demanding treats when I am out and about doing chores.
Brooding Terminology

Now with that background on natural duck aptitudes, let’s get into some details about brooding ducks for best results.
1. Broody Duck Descriptions
We call a duck “broody” when she starts collecting and showing signs that she’s going to sit a nest. Then, we call the process of her keeping her eggs warm so they’ll hatch “brooding”. Finally, we call the post-hatch care “mothering”.
Often, when you read descriptions about duck breeds you’ll see ratings for broodiness and for mothering. Some ducks get broody often. But then, they don’t do a great job of mothering their babies after sitting the nest.
So, if you want a duck to hatch and raise ducklings, make sure their breed is good at both brooding and mothering.
2. Incubating and Brooding

Here’s the confusing part. When humans hatch duck eggs, we call the process of warming the eggs so they’ll hatch “incubation”. Then we call the post-hatch care we give “brooding”.
Personally though, I think the term “mothering” or “parenting” makes more sense for what happens after hatching. You’ll be feeding, bathing, and cleaning up poop for a couple of months.
Plus, you’ll also be delighting over every adorable thing your ducks do and gloat over their accomplishments. (That sounds a lot like what new parents do, doesn’t it?)
Getting Started with Raising Ducklings in a Brooder

If you are ready to raise ducklings, you can start by incubating and hatching eggs at home. Or, you can buy ducklings from a breeder or hatchery.
Either way, once the ducklings hatch or arrive, your next responsibility is to raise them in a safe space.
1. The Importance of a Brooder
Remember how outdoor temperatures noticeably slow growth in ducklings? Well, this is the big reason we use a brooder to raise ducklings. A brooder is a confining, predator-proof space, that usually has a heat source to provide constant warmth for developing ducklings.
– Faster Growth
As mentioned, ducklings are quite cold hardy and can be raised without heat in spring-like conditions. However, using heat for the first couple of weeks and confining ducklings to a small area will expedite their growth rates.
Since they don’t have to expend calories to stay warm or to forage for food, everything they eat goes into body development.
– Fewer Losses
The brooder also minimizes losses. Nature is a tough teacher. Slower developing ducklings tend to succumb to the elements or to accidents outside the brooder early on; while clever, physically hardier ducks, have better chances of making it to maturity.
In a brooder, in ideal conditions, most or all ducklings survive.
– Mother/Brooder Combo
Some people use a mama duck and a brooder. Basically, in this scenario, the ducklings and their mama are confined to a safe space with supplemental heat.
I have not personally tried this method. My best mothers are my free-range Muscovies and they don’t do well in confinement. So, I offer them a private, protected pasture with a nighttime secure shelter. However other homesteaders have had good results having mamas raise ducklings inside a brooder.
2. Brooder Requirements
If you want to use a brooder to raise ducklings, or even just help mama take good care of them in a safe location, there are a few things you need to provide.
– Heat
Similar to chickens, using a heat lamp or brooder heating plates will help ducks grow faster. The key is to situate this at the opposite end of the brooder as the food and water. That way, ducks will gravitate toward the heat for comfort. Yet, they’ll also enjoy more ambient conditions while eating and drinking.
Typically, you’ll see ducks sleeping near the heater while their metabolisms are low. They will also go there to dry off if they get a little wet while drinking.
– Airflow
Ducks are adapted to live outdoors. So, putting them in an enclosed space isn’t going to allow enough fresh air for their lung development.
Situate them near a window so you can let in fresh air. Or put them in an outbuilding that is protected from drafts but still allows access to fresh air.
– Light
A location with natural daylight is best. That will help ducklings acclimate to actual outdoor lighting conditions. If that’s not possible, then use a daylight rated lamp to provide light when its light outside.
If you brood ducklings in fall, you can leave the light on a few extra hours to ensure that ducks get plenty of time to eat. However, a week or two before you put them outside, gradually reduce the hours of light until it matches up to actual outdoor conditions.
3. Access to Water

Ducklings need water shortly after they hatch. However, given their tendency to want to swim in it, you need to be smart.
An easy way to offer water, while deterring swimming, is to use containers with protective rims. Small sour cream containers with lids, or the square individual size smoothie containers, are good options for brand new ducklings.
Cut a hole in the container that is like a window in a frame. Nestle the base into the bedding just a bit so that it is stable and won’t fall over. Don’t dig it all the way in, then ducks can climb the rim. Fill with lukewarm water.
As ducklings get taller you can move up to half-gallon milk boxes or family-sized juice containers. Always make sure ducklings can reach the water with their feet still on the ground. (Or they are liable to fall in and have trouble getting out!)
4. Feed

ducklings greens to enjoy until they are ready for pasture.
Ducklings won’t eat much the first few days because their digestive systems are still developing. But they do still need 24-hour access to food. Eating little bits at a time will help them transition from their egg nutrient reserves to feeding themselves.
In the brooder, I use duck starter or game bird starter. The protein is usually 24-28%. The grind is a fine crumble that is easy for the ducklings to eat small bits of. Protein can be reduced to 20-22% after week eight.
– Medicated Feed
A lot of duck keepers say not to use medicated feed. I used to say that too. However, with more research and experience I have stopped worrying about feed that is only medicated to treat for coccidiosis. If the feed is medicated for other purposes, then I’d do more research before using it.
– Chick Starter
For ducks on lush pastures, raised with guidance from a mama duck, chick starter is typically sufficient as feed. However, chick starter is too low in protein for ideal duck development in a brooder.
Ducklings can survive on it. Yet, they tend to develop slowly and occasionally end up with preventable health problems.
If you can only find a chick starter, consider adding a supplemental protein source. Ground-up insects (e.g. mealworms), scrambled eggs, and even mashed kitten food can be used to increase protein.
– Grit and Scraps
If you are only feeding ducklings crumbled feed, they don’t need grit. If you plan to give them treats such as from your garden or kitchen, make the pieces small. Then, also give them access to chick-sized grit as a precaution.
5. Niacin
Niacin is critical to duckling development. Duck feed and gamebird feed tend to have enough niacin added. Chick feed doesn’t always have enough. Also, if you get ducklings shipped by mail, they may be short on niacin when they arrive due to transit time.
Duck hatcheries sometimes offer vitamin packets to use when ducks arrive. Or, you can buy niacin pills in the vitamin section. I take a 500 mg tab and grind it to powder using a mortar and pestle. Then I dissolve a pinch of niacin dust in duckling water each time I fill it.
Since ducklings drink more than they eat initially, adding it to their water better ensures they get some niacin in their system early on. Once they start eating well, then I switch to mixing it into their feed.
It’s much easier to prevent a niacin deficiency than to treat one. So even though this means extra work, dosing mail order ducklings or supplementing chick starter with niacin is a must for me when raising ducks.
6. Bedding
Similar to chickens, its common to use bedding such as straw or pine shavings on the bottom of brooders to manage manure. Avoid cedar or straw that is dusty. Shredded paper or pelleted bedding also works.
– Worm Beds
Personally, though, I’ve had better luck building my duck brooders over worm beds. I basically build a vermicompost bed under where I’ll put the ducklings.
Then, cover it with two inches of straw to keep the ducklings from eating all the worms. The wet manure seeps into the worm beds and that, plus the straw and spilled food, feed the worms.
Rake the bed top occasionally to keep a manure crust from forming. Also, add a light layer of bedding to cover excess manure.
– Ground Contact
Or, I use a hardware cloth-lined brooder in direct contact with loamy soil. Hardware cloth is necessary to ensure that diggers, like rats, don’t gain access to your ducklings.
Wet duck manure soaks in and is utilized by the worms and micro life living in the soil. Also, the micro life forms help disperse excess water. Often, I don’t even need to use much bedding to keep down smells and prevent manure build-up.
If the brooder floor gets a bit mucky, a light dusting of leaf mulch, micro pine shavings, or finished compost can be used to soak up moisture. Or, just move your brooder to new soil.
When you’re done brooding, move the brooder and use that space to grow a green manure cover crop. Then, use it as a ready to plant garden bed.
7. Cleaning
If you don’t use a worm bed or ground contact brooder, then you’ll need to clean often. You can use deep bedding. But due to the moisture content, duck bedding gets anaerobic quickly and smells terrible.
Instead, I use a side to side cleaning method. This requires an extra-large brooder and something to divide the two sides.
Start ducks in one half of the brooder. Apply a few layers of bedding as needed to keep the area tidy for duck feet. Then, when the bedding starts to get thick, move the ducks to the other unused half of the brooder.
Clean out the first half of the brooder direct to your compost pile. Put down brand new bedding. Then, when the other side gets ripe, move ducks back to side 1. Clean side 2 and repeat as necessary.
In their last couple of weeks in the brooder, you may need the whole brooder so that ducks have enough room. But at least then you’ll only have two weeks of bedding to clean, not two months.
8. Brooder Pond Fun

It’s fun to use a paint roller tray to give ducklings their first baths. It has a clear shallow end and just a bit of a deep-end for ducks to get clean.
When they get a bit bigger, I use rectangular plastic containers turned on their side with a window cut out. It’s shallow enough for them to stand up in. So, they can use the bottom of the container to push off and over the rimmed edge to get out.
(Later, I use those same containers to grow duckweed.)
If you set the container or paint tray inside a trash bag, you can just close up the bag and remove most of the sloshed water with it. Dump that outdoors.
Or, use a washable bed pad to absorb water. Both keep the brooder from becoming a soaked mess.
Turn your heat source on after swimming until ducks are dry. Never leave ducklings unsupervised during swim time. Always remove makeshift ponds when not in use.
Transitioning from the Brooder

Depending on your breed and your environmental conditions, ducks can be ready to move to their house and run or to a protected pasture in weeks or months.
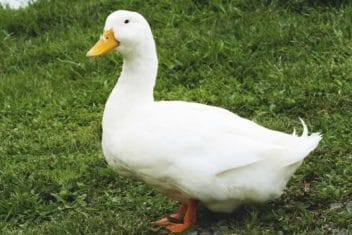
Fast-maturing ducks like Pekins often outgrow a brooder in weeks. Slower-maturing breeds like Welsh Harlequins, Cayugas, and Runners benefit from longer brooding.
When you feel ready to let them spread their wings in your duck run or house, give them plenty of supervision in their new space until you know they are safe and secure.