Pretty much every gardener I know has had at least one episode of frustrated crying or yelling. This is because so many things can go wrong when tending a garden. Even if you technically do everything “right”, inclement weather can come along and destroy all your hard work. Hopefully sharing my problems growing peas (and the subsequent lessons I’ve learned) will help to keep your own tears in check while cultivating them.
Wait, Aren’t Peas Super Easy to Grow?
Well, yes. Yes, they are. In fact, peas are some of the easiest garden vegetables out there. In fact, of all the veg I’ve grown over the past 25+ years, I’ve had more luck with peas than literally anything else.
That doesn’t mean they don’t have their issues, however. Don’t feel like you have the blackest of thumbs if yours struggle. These delicious legumes can suffer from a slew of different problems. Some difficulties will stem from soil pathogens or deficiencies, while others are due to insect damage, environmental factors, or predation.
Below are some of the main problems you may face when growing peas. By being aware of them ahead of time, you can try to avoid them as much as possible.
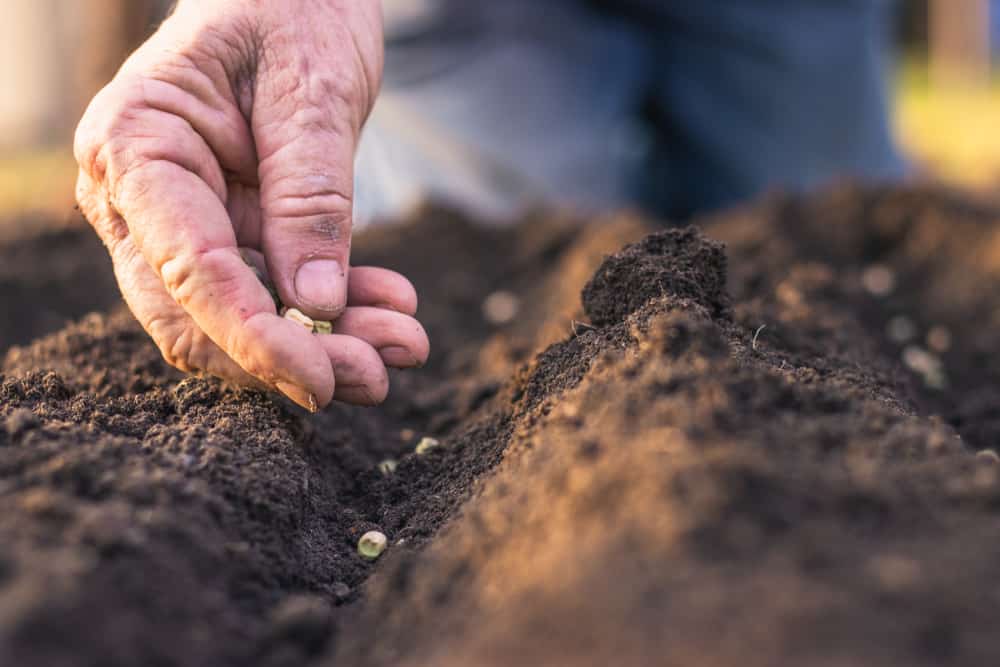
1. Failure to Germinate
Peas and beans are often used in kindergarten class experiments because they grow so quickly. The near-instant gratification of seeing these babies spring up is immensely satisfying and can inspire a lifelong love of growing things.
That said, sometimes seeds just don’t sprout.
If your peas haven’t sprouted within a week or two, then chances are the seeds are no longer viable. Maybe they were harvested before they were fully mature, or something happened to them while they were in storage. For example, if they were exposed to fluctuating temperatures or humidity then their growth cycle might have been triggered, and then aborted.
As a result, they’ll already be sterile and “spent” by the time you pop them into the soil.
Another reason why peas might fail to germinate is that the soil is too cold and damp when they’re planted. These legumes are famous for being some of the few species you can plant before your zone’s last frost date. That doesn’t mean they’ll thrive, however, especially if you live in a particularly cold climate.
On my USDA Zone 4b land, I’ve discovered that peas won’t germinate if I go by this planting rule. In fact, I need to wait until a good week after the last frost date to plant or the peas will rot in the ground.
Go ahead and plant just before the last frost if you’re in Zones 6 and up. Be a bit more cautious in colder areas and either wait to plant, or start your pea seeds indoors.
2. Stunted or Wilting Seedlings
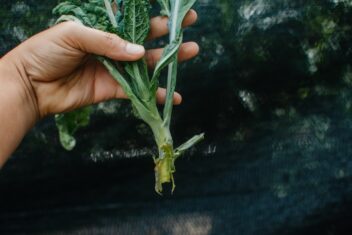
Various fungal issues and pathogens can cause your pea shoots to die off before they ever poke their heads up through the soil. Alternatively, they might start to grow but then get stunted and fall over. If you pull these little plants out of the ground, you’ll find that their stems get all spindly and brown or gray further down.
The pathogens that cause damping-off disease thrive in cool, moist soil. You might be able to avoid the issue if you wait to plant until the soil temperature has warmed significantly. Allow it to dry out quite a bit, then moisten it with warm, garlic-infused water before planting your peas.
Only water with warm liquid until the plants are growing merrily.
3. Wilting Plants
Peas are quite thirsty plants and can droop rather dramatically if they don’t get enough to drink. Mine had to be watered twice daily one year, so I added water-retaining amendments the following spring to avoid having to hose them constantly.
Work peat moss, rice hulls, coco coir, or vermiculite into the soil before planting to assist with moisture retention. You can also mulch around the area with un-dyed cardboard. Just make sure to keep the paper at least two inches away from the plants’ stems to avoid contaminating them with fungus or mold.
Check pea plants daily to make sure the leaves are perky rather than droopy and depressed-looking. Never let the soil dry out, and try to water at the soil level. Otherwise, you might end up with mildew issues on the densely packed leaves.
Underwatering isn’t the only thing that causes wilting, however. Peas are quite melodramatic in that they’ll droop over whether they’re thirsty or overwatered. The only way you can tell which issue they’re having is by poking a fingertip into the soil near the stems.
If the soil is dry, then they’re thirsty. If it’s wet, then they’re waterlogged. You want the soil to feel like a very well wrung-out sponge.
Simply make a few adjustments to your watering schedule and see if they perk up within a few days.
4. Wilting and Discoloration
If your peas are getting the right amount of water but are still drooping unhappily, they might be suffering from a wilting pathogen. Two of the most common are fusarium wilt and near-wilt. Both are caused by races of the pathogen Fusarium oxysporum, and both of these are soil-borne pathogens that restrict water flow in your plants’ stems.
Pull up one of the plants and check its roots and underground stem section. Wilt will cause the roots and lower stem to change color—usually to a yellow or reddish-orange. The roots will also be under-formed and limp, and might even look like they’re rotting.
You can avoid these by choosing pea varieties that are resistant to wilt. Alternatively, make sure to really turn your soil over before planting so the sun can get to it. Exposure to the sun (and hot, dry weather in general) will kill this pathogen. Also keep in mind that it thrives in acidic soil, so adjusting it to be more neutral may be beneficial as well.
If you do find fusarium wilt, pull up the affected plants and burn them. Then treat the surrounding soil with an anti-fungal agent such as Mycostop.
Be sure to rotate your crops every few years. This goes a long way towards helping you avoid this and other problems when growing peas.
5. Powdery Coating
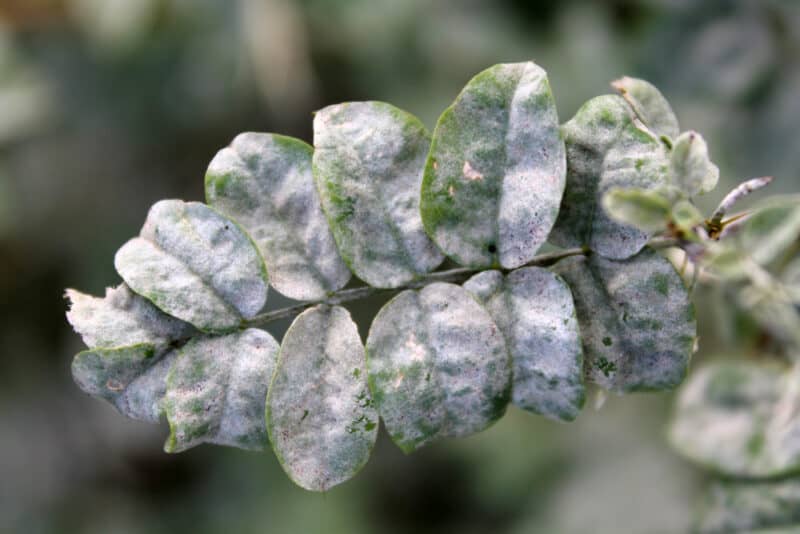
This is what caused my own fit of howling and weeping this past summer. The 12 woven tower structures in my yard were flourishing with masses of plump, delicious pea pods. Then we had a week-long period of torrential rain and suffocating heat.
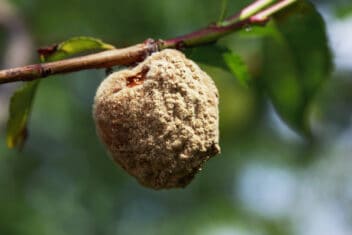
Once the rain eased up, I went out into the yard with my gathering basket, eager to harvest some of those beauties for canning… only to discover that most of the towers were absolutely coated in powdery mildew. Seriously, the leaves looked like coated tongues after a week’s worth of binge drinking.
Powdery mildew is a pathogen (Erysiphe pisi) that lives in the soil and leaps into action during hot, humid weather. You can reduce the chances of it thriving on your pea plants by pruning away a lot of their leaves. Do this as soon as blossoms start to appear. This will allow plenty of air to circulate, thus preventing moisture (and by extension, mildew) between the leaves.
It’s one of those pea growing problems that we all encounter sooner or later.
If powdery mildew does appear and you can catch it early, remove and burn all affected leaves. Then spray your plants with diluted apple cider vinegar. If the disease is already fairly advanced, you’ll have to pull all your plants up and burn them so they don’t contaminate other areas. Keep that part of the garden mowed and fallow for at least a couple of years, and treat the soil with antifungal agents.
6. Mottled Yellow Patterns on Leaves
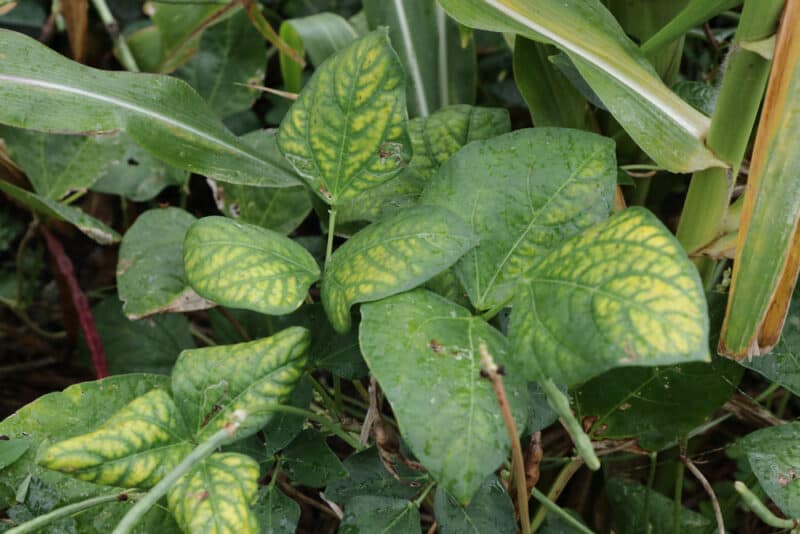
Are you seeing strange mottled patterns on your peas’ leaves or pods? This is a surefire sign of mosaic virus, which is insidious to say the least. It’s more common in field peas than climbing varieties, and is usually transmitted via aphids. There’s no cure for it per se, but you can pre-treat soil with organic fungicides before planting, and choose disease-resistant varieties to cultivate.
Note that black-eyed cowpeas are particularly susceptible to this pathogen. As a result, you might want to choose different varieties if you’re in an area that’s prone to this virus. If and when you do find it in your plants, pull them up and burn the lot. Call in an old priest and a young priest to help, if desired.
7. Curled, Yellow Leaves
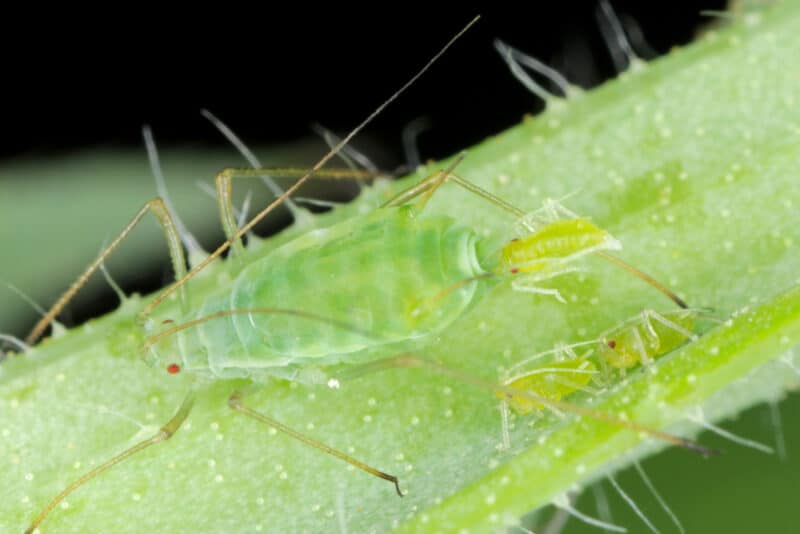
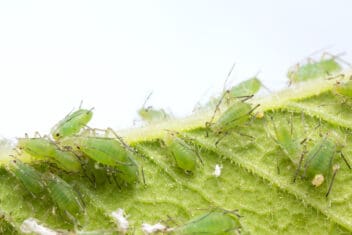
If your plants’ leaves are curled, yellowed, deformed, and covered in sticky goo, then you’re probably dealing with an aphid infestation. In fact, many problems growing peas can be attributed to aphid damage.
These tiny bastards multiply prolifically and wreak all kinds of damage whenever they go. The sticky residue they leave behind is called “honeydew”, and is in no way related to the delicious melons that share that moniker.
Aphids can also carry and transmit pea streak virus and mosaic virus. Both of these are incredibly annoying to deal with, especially since they can hang around in the soil for years.
To get rid of aphids, hose down your plants with neem oil or insecticidal soap. If the plants have either of the aforementioned viruses, however, you’ll need to pull them up and burn them.
Try to attract as many ladybugs as possible to your garden. They can work wonders at keeping the ladybug population down, which will only make your garden healthier in the long run.
8. Plants Cut Down at the Base
These are actually caterpillars, as they’re the larvae of various night flying moth species. They crawl out of hiding as the sun is setting and munch on your peas and other veggies at night. In fact, cutworms will burrow their way into the plants’ stems and damage them badly before moving on to the leaves.
You can prevent too much damage from them by rototilling your soil thoroughly before planting in the spring. This will bring their eggs to the surface, where they’ll be preyed upon by various insects, reptiles, amphibians, and small birds.
If they’ve matured to the larval stage, you can let poultry like chickens, quail, or Guinea fowl run around in your garden. They love to eat caterpillars and will pick them cleanly off your plants. Many other birds will also enjoy ridding your garden of these pests, so be sure to keep bird-friendly feeding and watering stations nearby.
Finally, you can plant sunflowers or Jerusalem artichokes around the perimeter of your garden. Cutworms love Helianthus plants more than anything and will veer in their direction rather than your peas and beans.
9. Brown, Wilted Leaves
If you’re dealing with yellow-brown, wilted leaves, check around them for dusty-looking webbing. Should you find any, then you’re likely dealing with spider mites. These tiny arachnids like to suck the juices out of various plant parts, but fortunately, they’re fairly easy to deal with.
There are a few other problems that can cause wilted, brown leaves on your growing peas, but the webbing is a sure sign.
Just hose your pea plants down with insecticidal soap, diluted Castile soap, or neem oil. Do this every few days and the mites should flee in search of more savory fare.
10. Trails in the Leaves
Are there silvery or white trails all over your pea plants’ leaves? Then you’re likely dealing with leaf miners. These are the worm-like larvae of several fly species, and they love peas, beans, and various leafy green crops. A lot.
The best way to deal with these is through preventative measures, unfortunately. Till your soil well in the autumn to expose or kill off the eggs. Then till again in springtime before planting. Plant trap crops such as lambsquarters in the area to distract them, and consider covering your plants with floating row covers or mesh netting.
When and if you do find affected leaves, remove them and burn them. This will prevent them from contaminating other nearby plants, especially if a fresh set of eggs has been laid beneath them.
11. Vines and Leaves, but No Flowers
Are your pea plants bushy and green, but aren’t producing any blossoms? Then you’re likely dealing with too much nitrogen in the soil. You’ll need to get a soil-testing kit or send in your soil to your local extension office to confirm this.
If it does turn out that there’s too much nitrogen going on, you can work some sawdust or aged woodchip mulch into the soil. It’ll help to draw the nitrogen out, balancing the soil’s nutrient levels nicely.
In the future, avoid problems like this when growing your peas by testing before applying any fertilizer.
12. Flowers, But No Pea Pods
I’ve only had to deal with problem this once when my pea plants got exceptionally vegetative. What happened was that there was so much leafy growth that pollen from some blossoms wasn’t getting spread around sufficiently to fertilize others.
Cut away excess leaves during the blossoming period and give the plants occasional gentle shakes. This should help to disperse the pollen. Alternatively, you can get some cheap face powder makeup brushes and use them to transfer pollen between blooms.
13. Disappearing Plants
Are you pea plants disappearing mysteriously? Then chances are you have some hungry herbivores in the area and they’re treating your property as a smorgasbord. I’ve lost pea shoots, mature plants, and plenty of pods to rabbits, deer, and a rather charming groundhog I affectionately nicknamed “Charlotte la Marmotte.”
If possible, install animal-proof fencing to keep these adorable-yet-infuriating critters away from your peas. You can also scatter predator poop (like wolf or coyote) around the area to fend them off. Another solution is to hose the plants down with neem oil: animals can’t stand the scent or taste of the stuff and will venture elsewhere for their salad greens.
Helpful Tips
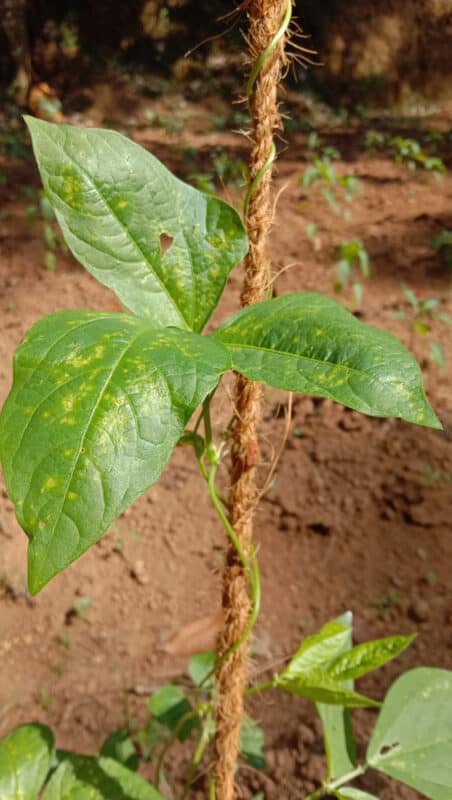
As mentioned earlier, you can do absolutely everything “right” and still have crop failure. We do the best we can and hope that our efforts will be well rewarded. You’ll probably still have problems growing peas someday, but hopefully, they’ll be few and far between.
In my experience, the best approach is to be proactive with defensive measures. Rotate your crops regularly, and let areas affected by powdery mildew and fusarium wilt lie fallow for a few years. Additionally, choose disease-resistant seeds and seedlings whenever possible.
Diversify your garden by planting crops in several different areas, rather than clustered all together. For example, instead of planting all my bean and pea towers in one yard, I disperse them all around my property: this way, even if a few of them fall to blight, the rest should evade contagion.
Most importantly, remember that every gardening endeavor is an experimental learning opportunity, and try to have fun with the experience!
