I remember the first time I visited a cheese shop in France. An overwhelming variety of aromas just about knocked me over as I walked in the door. The essence of fresh butter, impossible nuttiness, dried grass, mushrooms, and even stinky feet filled my nose and lungs.
Honestly, as an American, having never experienced this range of fragrances all in one place, it almost sent me street-side again. But, the stunningly-colored labels and enormous wheels of cheese stacked along the back walls beckoned me further into the store.
It took a few minutes to acclimate to that whole new world of cheese. Yet, by the time I walked out, over an hour later, and $100 poorer, I was transformed!
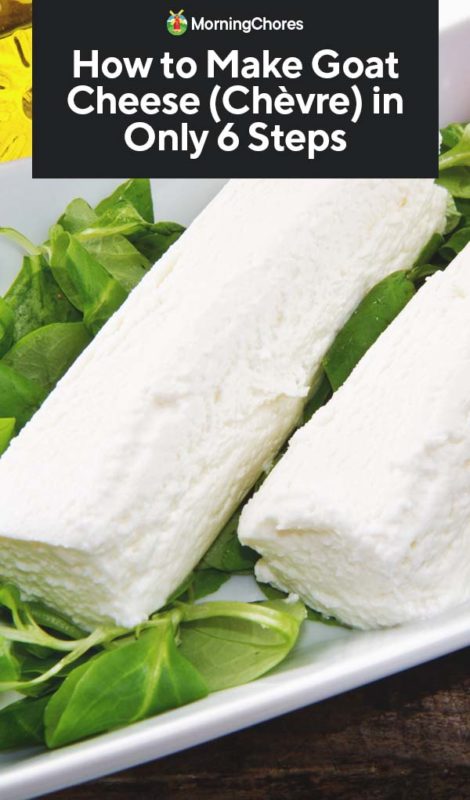
Fromagerie to Homestead Creamery
We all have experiences that open our minds and set us on a new course. Well, for me, that visit to my first “fromagerie” (French for cheese store) was one of them. It ultimately led to me keeping a herd of Nigerian Dwarf dairy goats on my homestead and making goat cheese several times each week.
If you also have an incredible cheese affinity, then raising goats for milk, and making cheese at home might be your calling too! Honestly, though, getting started with goats was the easy part. Working up the courage and confidence to make cheese was a bit harder to do.
Overcoming Goat Cheese Fears
Most of us are used to eating industrial cheeses produced in factories. The factories are sterile environments where cheese-makers in scrubs and shower caps operate stainless steel machines. Temperatures and quality are continuously checked.
Finished products come shrink-wrapped in plastic. The USDA steps in and inspects everything, so consumers don’t end up sick from scary things like listeria and salmonella. Quite frankly, that kind of cheese making is pretty intimidating.
If we had to make cheese like that at home, none of us would. Luckily though, none of that is necessary on the homestead. People have been making cheese using very simple procedures for thousands of years.
As long as you use exceptionally fresh milk, cleanly collected from healthy goats, your risks are much less than when you work in large quantities. You do need to do a little research to establish a good cheese-making routine.
Then, start with one simple cheese and practice that until you are able to produce a good representation of that style consistently. After that, move on to other varieties.
All About Chèvre
If I were starting all over again, the first cheese I would make would be what I call my “chèvre.” It’s a single-culture, rennet-coagulated, fresh-eating cheese. It can be made with just a couple of minutes of work using standard kitchen equipment.
Chèvre is a French word that means “goat cheese” or cheese made from goat’s milk. However, the most basic form of chèvre is an un-aged, semi-soft, spreadable cheese that goes well on crackers or sandwiches. It also makes excellent dips and can double for cream cheese in many situations.
You can make it using natural cultures that are floating around in the air of your home. But if you want a consistent result, you can also use a mesophilic culture that you can pick up online.
When you read the steps that follow, I think you might be pretty surprised at how streamlined they are. Here’s the thing, this is not an artisanal cheese recipe. I make cheese in between 17 other homestead activities. For that reason, this recipe won’t take half your day (or all of your attention) to make.
But, don’t worry, it’s still amazingly delicious. The texture is luxurious. Oh, and if you are used to grocery store goat cheese, you’ll be convinced by the first bite that buying goat cheese is a total waste of your time!
4 Ingredients: Culture, Rennet, Goat Milk, Salt
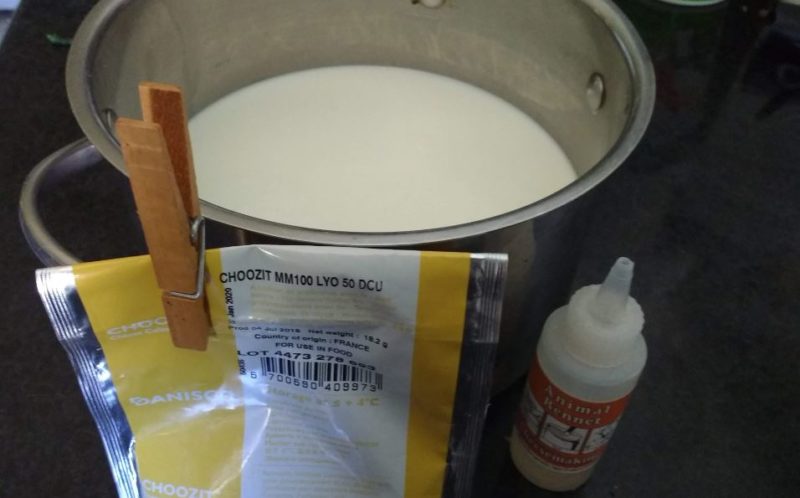
Chèvre is a four ingredient cheese. Two of those ingredients, culture and rennet, can be bought online from cheesemaking supply companies.
Mesophilic Culture
I buy bulk packages of the culture called MM100. It’s freeze dried and lasts for about a year. You only need tiny quantities to make fresh chèvre at home. Plus, you can use it for all sorts of other things like soft-ripened cheeses (e.g., Brie-style), a cheddar-type goat cheese, and more later.
Rennet
I also recommend you use rennet. Chèvre can be made without rennet. But, it can take a while for the cheese to set up naturally without rennet. So, you run more risks of getting off flavors and aromas. Plus you have to wait longer, and fresh cheese is all about instant gratification!
For vegetarians, you can buy vegetarian rennet. However, if you are a meat eater, then I highly recommend you use animal rennet as your coagulant.
Goat Milk
Additionally, you’ll need milk from a goat. If you have concerns about using raw milk, you’ll want to pasteurize your milk first and allow it to cool to 86°F before use.
If you don’t have dairy goats, then you’ll need to buy goats milk. If you buy milk at the store, it’s already pasteurized. Avoid buying “UHT” or ultra-high temperature pasteurized milk if you can because the end texture isn’t as nice.
Also, go for full fat! No skimmed goat milk for chèvre please.
Salt
For some cheeses, you salt the outside of the cheese. You’ll get the best results if you use specialty cheese salt that is the perfect particle size to penetrate to the center of your cheese form.
For, this cheese, though, you’ll be stirring your salt in. You can also taste it as you go, so you can use as much or as little as you like. That means you can use whatever salt you have on hand.
Note on Quantities
You probably noticed I hadn’t given strict guidelines about how much culture, rennet, milk, or salt that you’ll need. That’s because you can adjust this recipe to make as much or as little as you want.
I tend to work in half gallon batches simply because that’s how much fresh cheese I can eat within 2-3 days. But you can make as little as a quart of milk for one small round of goat cheese, or you can make multi-gallon mixes if you want to.
The quantities of culture, rennet, and salt can be adjusted as you go based on the amount of milk you have to work with. I’ll give you pointers on how much to use in the steps that follow.
6 Steps to Make Goat Cheese
Step 1: Milk Preparation
If you milk your own goats, your cheese-making starts with your regular routine of milking your goats and straining the milk. The only difference is you’ll strain your milk into a pot you can use for making cheese instead of a jar. You can also use any other sufficiently large container with a lid.
For good bacteria production goats milk needs to be at about 86°F to promote flavor development. Luckily, straight from the goat with a short walk to the house usually gets you to exactly the right temperature to get started.
Warming Milk
If you are using refrigerated milk, you’ll need to warm it first. A lot of people use a double boiler to heat the milk, so it doesn’t stick to the pan. That works great.
Personally, though, I use a heavy bottomed pan and a wooden spoon. I stir gently to keep the milk from sticking to the bottom and to move the heat through the milk. It only takes a few minutes to get your milk up to temperature over full heat using this method.
You can use a thermometer to check your temperature. Or just put a few drops from your spoon on the inside of your wrist (like you would for checking a baby bottle). If it feels warm, but not hot, it’s ready.
Leave the milk in the warm pot to start the steps below. The pot will help maintain the heat while the culture acts on your milk.
Now, with the various milk preparations sorted, let’s get started!
Step 2: Add Mesophilic Culture
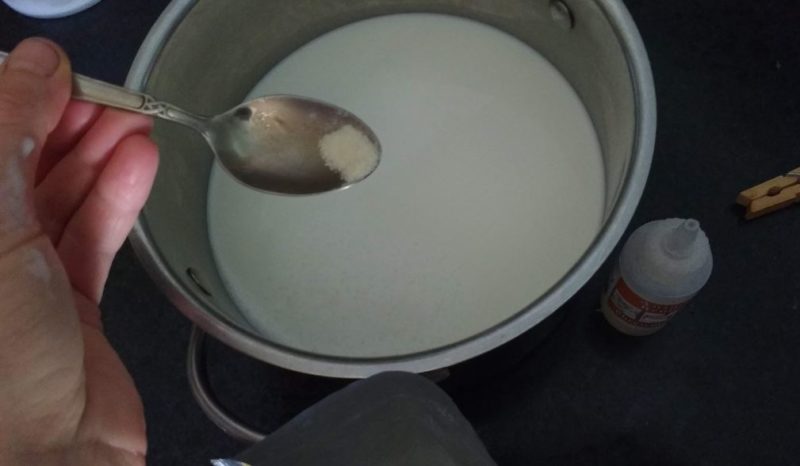
Every culture has a different bacterial activity level. So, you’ll need to refer to your culture packet for exact guidelines on how much culture to apply.
Generally though, the bulk packets will set up about 25-50 gallons of milk. When working in small batches, I go a little heavy on the culture.
So, if you look at the quantity in your packet when you open it and try to apply about 1/25th of the amount in the packet per gallon of milk, you’ll be in the ball park. Make note of how much that is for future use since you only get to look at a full packet once.
Sprinkle the culture on top of your milk. Wait 30 seconds for it to rehydrate. Then stir gently to spread the culture through the milk.
Cover and let the milk and culture sit for 1-2 hours in a warm location. The culture will multiply rapidly in the milk infusing it with taste and aroma.
Step 3: Add Rennet
After culturing, add a drop or two of rennet to each quart of milk you used. Every drop is going to be a slightly different size. So there’s not a whole lot of precision possible when it comes to using rennet for small batches. Just try not to go overboard.
Some people will put the drops of rennet into some cool water and then pour the water into the milk. If you are afraid you’ll get wild with the rennet when trying to squeeze out a drop or two, then feel free to do this extra step. Otherwise, you can just put the rennet directly in the milk.
Stir gently to disperse the rennet through the milk for a few seconds. Cover the pot with the lid and let the milk set up. This usually takes between 1-2 hours.
Step 4: Cut the Curds
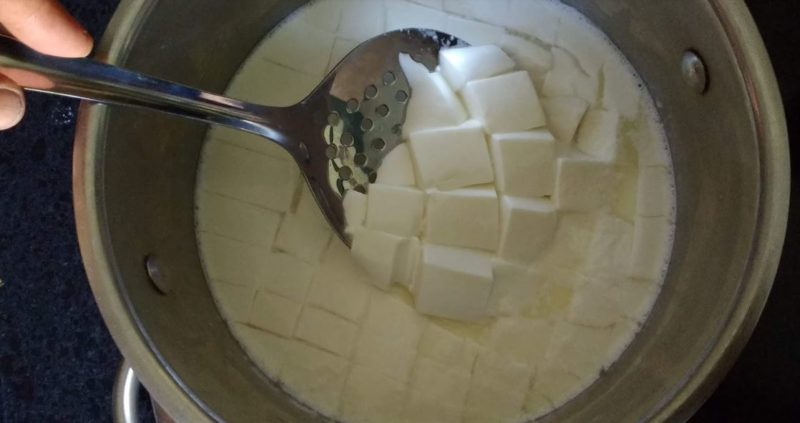
Within a short time after you add the rennet, you’ll see your milk start to thicken. Soon it will take on a glossy appearance and begin to look a whole lot like tofu.
If you let it go longer, the tofu-like glob of coagulated milk will end up floating in a pool of yellowish liquid called whey. The longer you leave it, the more the curd mass shrinks and the whey mass increases.
For this particular cheese, you want to cut the curds when they first start to look like tofu. If you wait until the whey begins to push out, your cheese won’t be quite so creamy at the end.
When your milk looks like tofu, take a knife and make a cut in the curd mass. If the knife goes through cleanly without breaking or tearing your curd mass, you are ready to cut the curds. If not, let it sit a few more minutes.
To cut the curds, use a blunt knife to make a checkerboard out of your curd mass. Go for squares that are about one inch in size.
Step 5: Dry Your Cheese
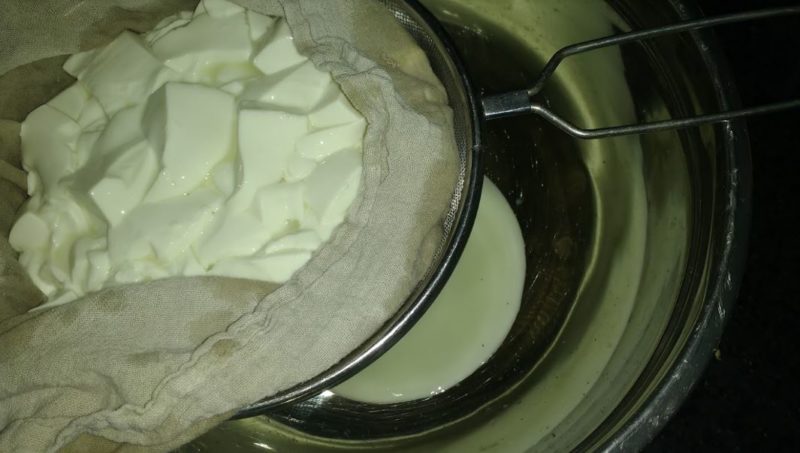
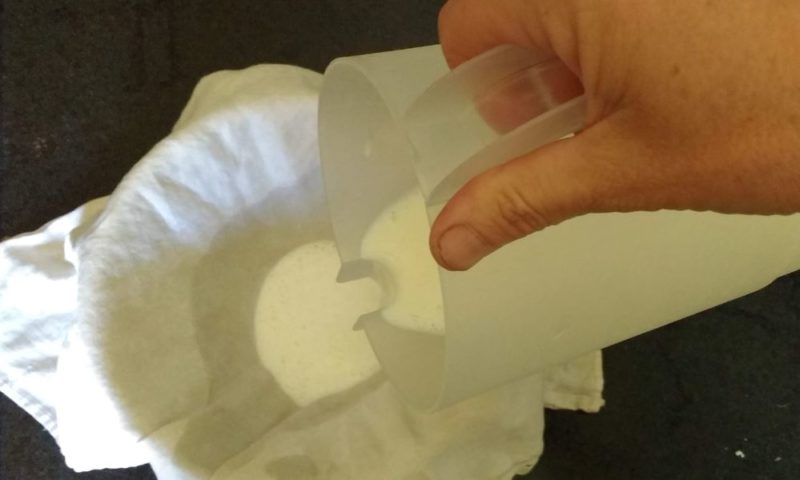
After cutting your curds, set up a draining station for separating your curds from your whey. I lay a flour sack towel over a sieve or colander. Then, I set that inside a big bowl so I can collect the whey.
I use a pasta ladle to lift the curds from the pot and set them into the towel. When your curds are all in the towel, turn the towel into a strainer bag. Hang that someplace out of your way, to let the rest of the whey slowly drip out. (No need to squeeze. Gravity will do the work for you.)
Some people use their kitchen sink spout to hang their curds to dry. Personally, I hang it from my cabinets on my counter with the bowl beneath to catch all the whey.
Draining time varies depending on the state of your curds when you cut them. Generally, I tend to let mine hang for about 4 hours. Honestly, though, I’ve even left it overnight and had good results.
Step 6: Salt to Taste
Now, put your cheese in a mixing bowl and work in however much salt you want. I tend to use about a teaspoon of sea salt for half gallon batches. But, the quantity really varies based on the kind (e.g. iodized or sea salt), grind size of the salt, and your taste preferences.
I also find that mixing with my hands distributes the salt a bit better than with a spoon.
Now, you can eat your cheese straight away, or you can do the optional step below to make it pretty.
Note: If you want to use this cheese for dessert with a drizzle of honey or maple syrup, then skip the salt entirely.
Lastly: Make Logs
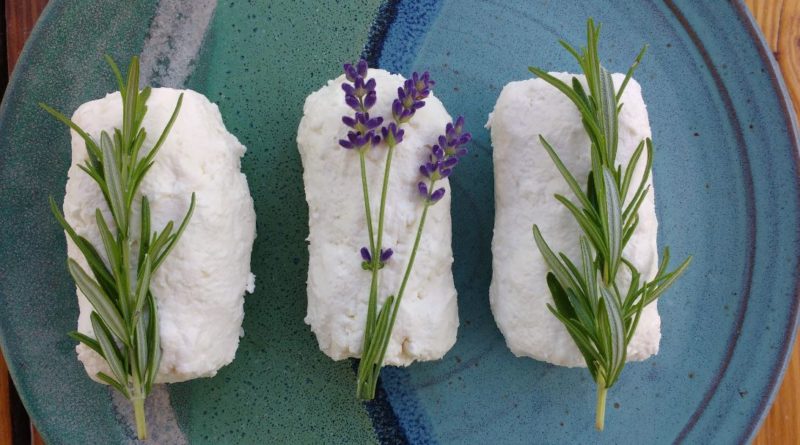
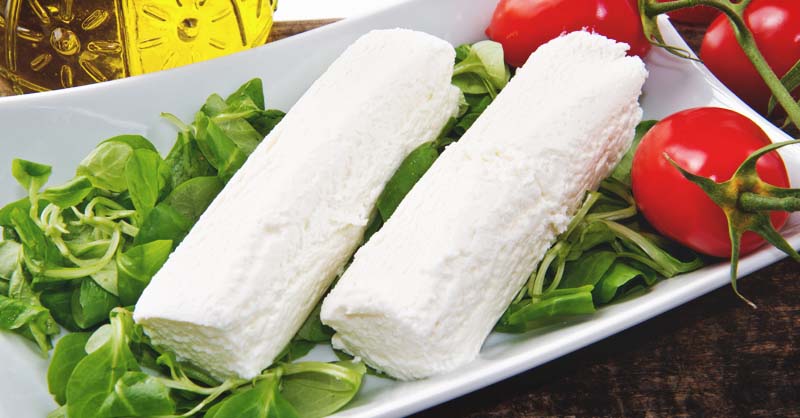
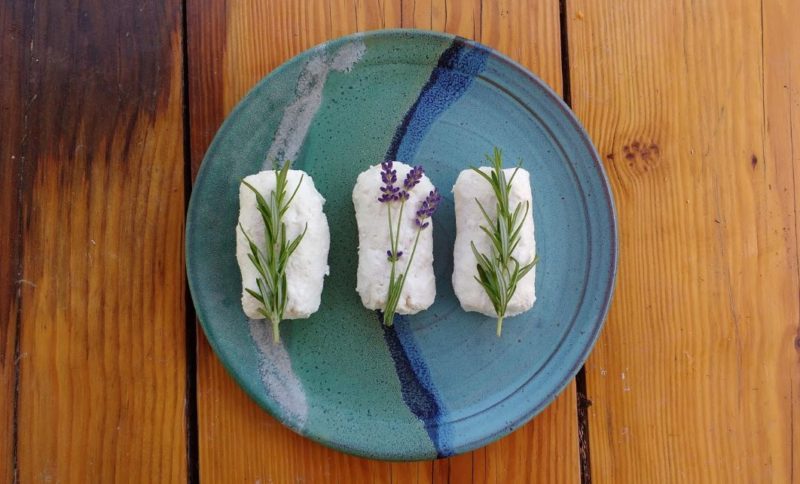
Once your cheese is dry and salted, you can roll them into perfect goat cheese logs like you’ve seen at the supermarket. You can do this using molds, films, or other tools if you want to.
Personally, I use my washed hands to form the cheese just like I would any dough. Then, I like to cut some fresh herbs from the garden as a garnish to make my cheese pretty.
These decorative details only take a few extra minutes. However, they can really enhance your cheese experience and make it feel like you are enjoying a fine chèvre from a fancy fromagerie at home.
Cheesy Beginnings with Happy Endings
All in, I spend about 10 minutes of work making chèvre. It takes the better part of the day for the culturing, renneting, and drying to happen. Thankfully though, I don’t have to be around for any of that. I can be off in the garden, out with the goats, or otherwise engaged around the homestead.
That’s why chèvre is a great place to start your cheese-making routine. However, once you understand the basic process of making cheese, you’ll discover that just about every cheese type can be made in only a few minutes, here and there, within the context of your other activities.

Some cheeses may take specialized equipment or require more work for proper aging. Fundamentally, cheese of all kinds is something we can all make and enjoy at home. Bon Appetit!
