Orchids are perhaps one of the most famous flowers in the world. They’re also surrounded by myths about how difficult they are to try growing. They have an exclusive air to them, but the truth is many varieties aren’t hard to grow and you can even propagate your own. And, yes, you can make them bloom over and over.
Of course they, like all plants, require specific conditions to grow well, but their needs vary. Many people are surprised to find there might even be varieties native to their area, from deserts to temperate rain forests.
Let’s explore the amazing world of orchids.
What are Orchids?
Most orchids are found in tropical areas of the world like Asia and South and Central America. However, there are varieties that grow on every continent except the Arctic and Antarctica.
Orchids can be broken into two groups:
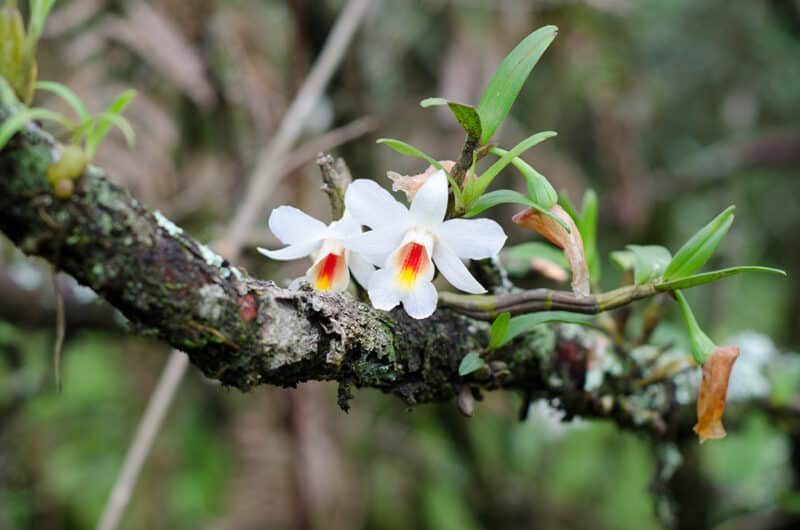
Epiphytic are air growing. In the wild, this type grows on trees. They are found on trees and stumps where they draw moisture and nutrients from the air and the decaying foliage of the forest.
Terrestrial orchids are, as the name suggests, orchids that grow in the ground in soil.
Varieties of Orchids
With around 30,000 varieties of orchids and over 200,000 hybrids, it’s easy to be overwhelmed even thinking about growing them, but with the right selection, you have a great chance of success.
Since there are a huge number of varieties, we’ll narrow it down to those that are best for the beginner orchid grower. Feel free to explore and experiment with other varieties, especially if you have native orchids in your area, since they are adapted to your particular climate.
This list for beginners could easily be dozens of orchids long, so talk to your local nursery and they can share what’s available and suitable in your area.
Paphiopedilum
Lady’s slipper or slipper orchid is one of the easiest to grow for the beginner. It’s one you’ll often see for sale in supermarkets and farmer’s markets. It’s a terrestrial variety that has long-lasting blooms that come in a variety of colors.
Cymbidium
Boat orchids are ideal for beginners as they produce large blooms and aren’t as fussy as some of the other varieties. They’re native to Asia and can tolerate colder temps than many other orchids. It makes a great outdoor variety in temperate regions.
Phalaenopsis
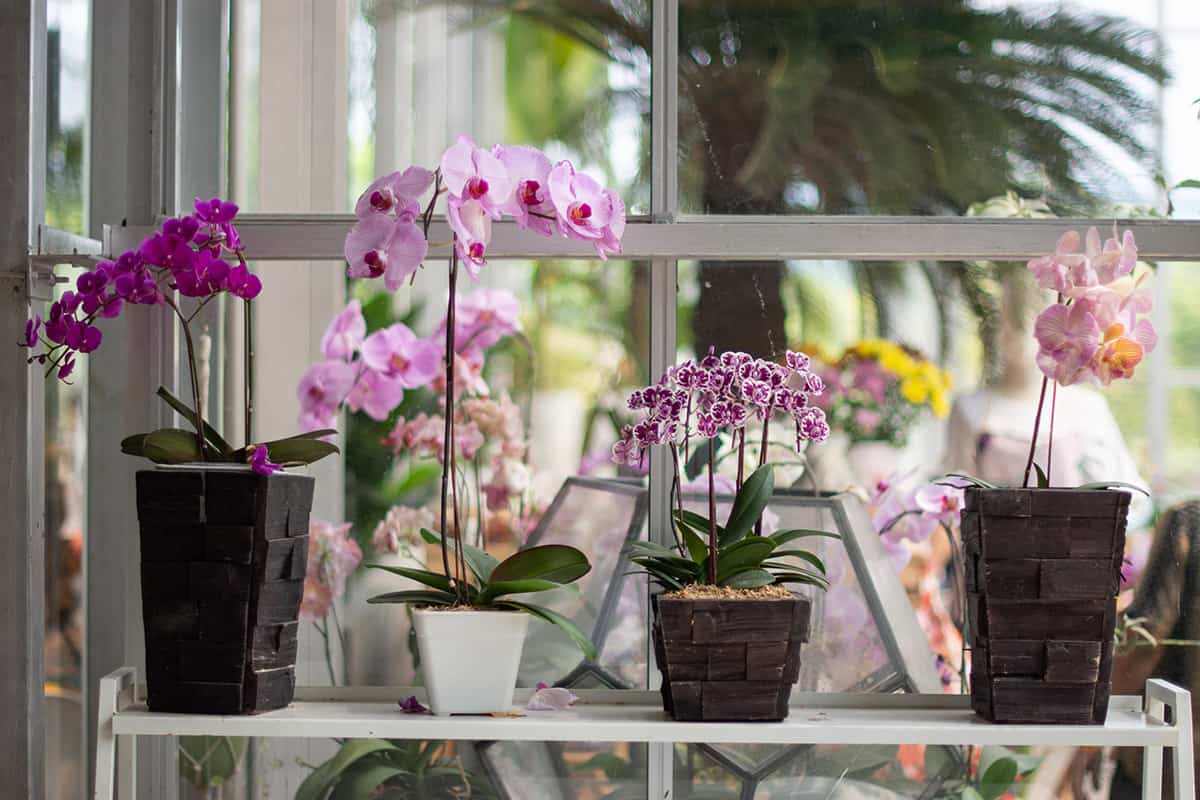
If you have been gifted an orchid in a pot, it might very well have been this popular beginner’s variety. Moth orchids, as they’re sometimes called, come in many colors and although they look fragile they’re surprisingly robust. These are epiphytic but grow well in pots indoors where they love warmth, humidity, and plenty of food.
Oncidium
Reasonably easy to grow, the swaying flowers of this orchid look like dancers leaping about in the air, giving this plant the nickname dancing orchids. They are fast-growing and need about five to eight hours of light each day.
Brassavola
If you want to try a mounted orchid as a beginner (we’ll talk about this later) this is a perfect one for you. It’s highly fragrant and also suits container growing. It’s a little more drought-resistant than most varieties.
Dendrobium
I love this for beginners and it’s the one I started with. It’s perfect because you don’t have to repot it often (maybe every two or three years) because it hates being disturbed. It prefers being root bound in a pot and despises wet feet.
Phaius Tankervilleae
This is a large variety, but the growth is upright and compact. It’s been known to reach four feet in height, so it’s impressive.
How to Grow Outside
I suggest beginners try growing orchids in pots indoors until they get used to the intricacies of orchid growing. That said, it’s possible to grow them outdoors.
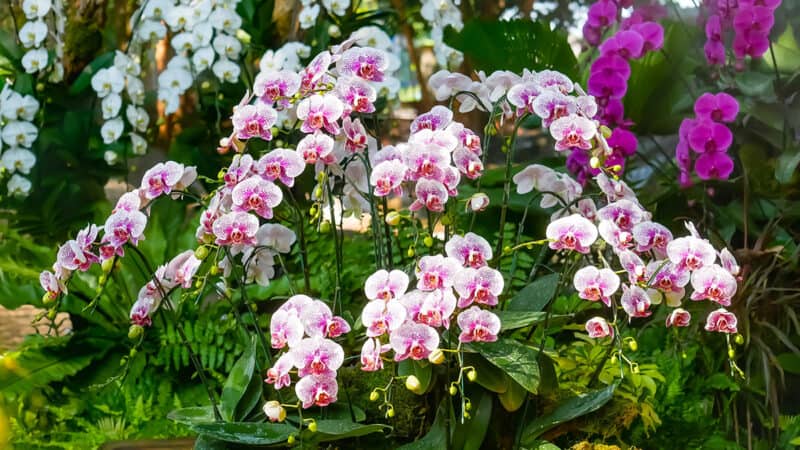
In zones 6 to 9, many orchids can be grown in the garden. If temperatures drop below 40ºF plant in containers so you can move them inside. Be warned though, as a beginner growing orchids outside can often be a series of failures.
Remember that orchids need dappled sunlight, humidity above 40 percent, and most require a good amount of moisture.
Try:
- Lady’s Slipper for shaded areas of your garden
- Nun’s orchid for partly shaded and partly sunny areas. Keep the soil moist at all times so consider irrigation.
- Moth orchid will need deep shade as it has an aversion to direct outside sunshine.
Cymbidiums, dendrobiums, encyclias, and spathoglottis are all good options.
Growing Orchids Indoors
I plant all of my orchids indoors due to the environment where I live. It’s either too hot in the summer or too cold in the winter to grow outdoors.
Usually, if you buy an orchid from a retailer or grower, they come in a clear plastic pot with plenty of holes. This is because most orchids need good airflow and drainage. You then place this inside a decorative container.
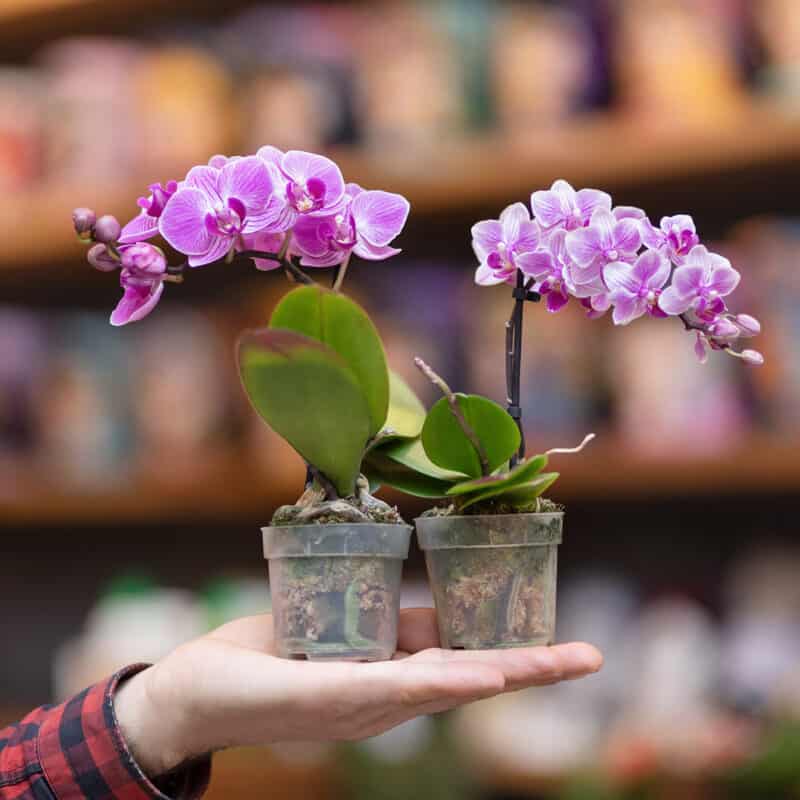
If the outer pot supplied is a cheap plastic one with no holes or drainage, find something else. Terra cotta breathes well, which is ideal, but any pot with a drainage hole works.
You can also find baskets or wooden slatted containers made especially for orchids. They usually need to be lined with peat moss or coconut husk, but they allow good airflow to the roots. They need frequent watering as they drain freely.
I highly recommend the basket type of container as they are the easiest to use.
Always use a medium that is specific to orchids. Don’t use standard potting mix.
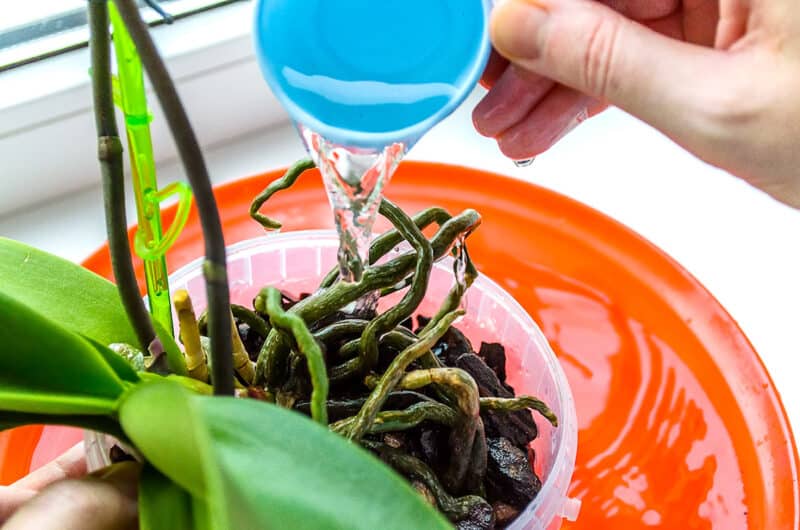
Water twice a week by holding the pot under the faucet. Use tepid water and stop when the water drains from the pot. Don’t water the leaves.
Use an orchid-specific fertilizer starting one month after you bring it home. While it is in bloom, fertilize every two weeks. After that fertilize once a month.
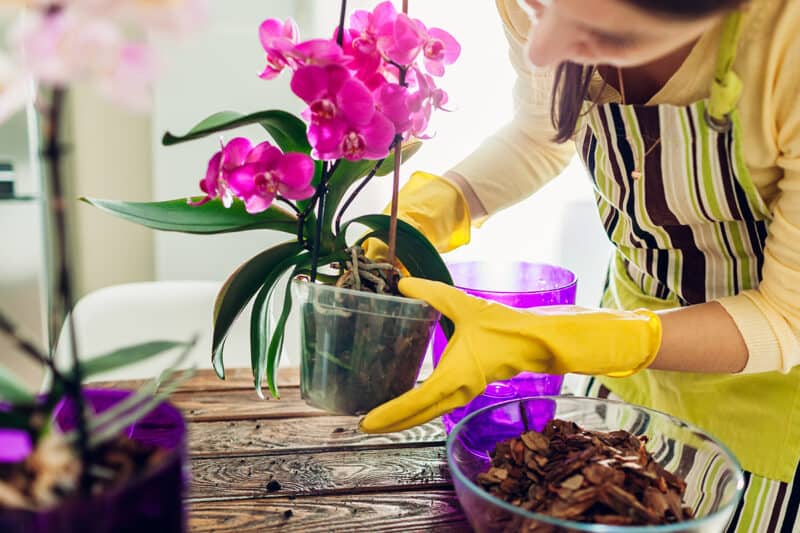
Repot every few years as the roots grow and fill the container.
Mounting Orchids
Epiphytic orchids can be mounted on hardwood or cork slabs. Once you have mastered orchids in pots, think of this as the next step. Cattleyas, particularly brassavola orchids, do well using this method.
One of the advantages of this method is that you don’t have to constantly repot your orchid. The disadvantage is that you have to be very diligent about watering.
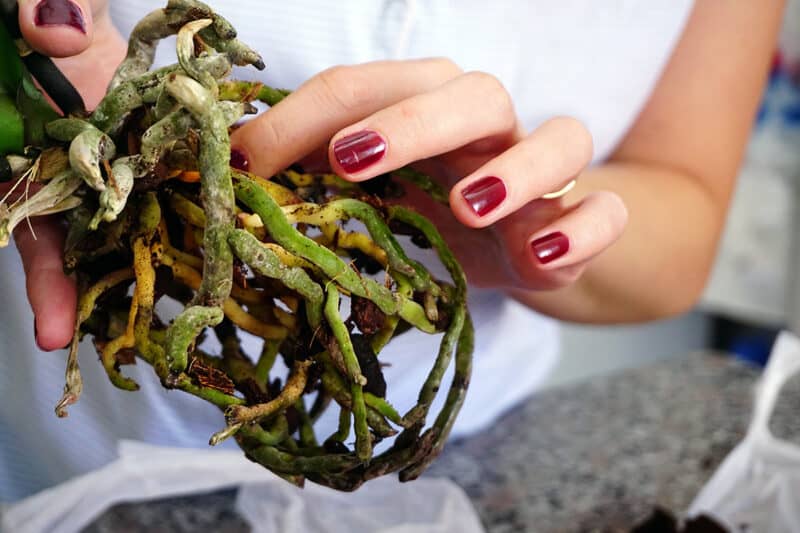
Remove the orchid from its container and brush away any soil or potting medium. Soak the orchid in water for 20 minutes to make the roots more flexible. Soak some sphagnum moss and wrap it around the mount. Spread the roots around the moss. Secure everything in place.
You can use soft string, pantyhose, or even fishing line to secure it.
This is a natural way for an orchid to grow, but you will need to make sure you’re providing the right amount of water for your particular type of orchid. You’ll also need to use a foliar fertilizer.
Propagating Orchids
Growing orchids from seeds is nearly impossible. Where most seeds have nutrition stored within them for growth, but orchid seeds don’t. They have to fall from a plant and come into contact with a particular fungus that penetrates it to convert nutrients.
Propagate your own with these methods.
From a Stem
Choose the stem you are going to use. It should be thick, healthy, and at least eight to ten inches long.
As close to the base as possible, cut the stem just above a node or leaf joint. Cut the stem into small pieces that have two nodes on them.
Lay them in a tray lined with damp sphagnum moss and place the tray in a plastic bag. You are trying to create a humid environment so place the bag in dappled sunshine.
Keep the soil moist. Once you see the seedlings emerging, tent the plastic bag using sticks so that the seedlings have room to grow.
Once the seedlings have several leaves, you can transplant them into pots.
From Offshoots
For beginners, this is the easiest way to propagate orchids. Some orchids will grow a little offshoot at the base. When the offshoot has at least three leaves and one-inch roots, carefully cut it off. Plant it in sphagnum moss and keep it moist.
How to Get Your Orchid to Rebloom
Many people buy an orchid at the store and bring it home to enjoy the stunning blossoms. But when those blossoms fade, many people end up tossing the plant and starting with something new. But with the right steps, you can make your orchid bloom over and over again.
In order to convince your orchid to send up new flowers, you have to trick it into thinking it’s in its native habitat.
Every orchid differs in its requirements, but the main elements you need to adjust are light, water, food, and temperature. Cut off any spent flower spikes to tell the plant it’s time to think about sending up new blossoms.
If you’re keeping your orchid in an east-facing window, you won’t need to do anything. Otherwise, you’ll need to try to recreate the lengthening and shortening days of the natural yearly cycle.
You’ll also need to give your orchid different temperatures than usual. Most need a cool period to signal its time to bloom. Read up on the temperature needs of your particular species.
Switch to a phosphorus-heavy fertilizer until the plants bloom and water a bit more sparingly than normal.
Common Problems and Solutions for Growing
There are many things that can go wrong when growing orchids, but these are the most common things a beginner faces.
Bud Blast
If your buds are drying up or falling off for no apparent reason, you may have bud blast. This can be caused by incorrect watering, not enough or too much light, or incorrect humidity. Research your plants preferred conditions and be careful to recreate them as closely as possible.
You should also watch for pests or diseases, which can cause bud blast.
Root Rot
Orchids hate wet feet in a medium that doesn’t drain. Your plant will go yellow as if it’s not getting enough nutrients. Check to see if the roots are black and mushy. Cut the affected roots away and replant in a new medium. Then, be cautious about how much water you’re giving.
Bacterial Rot
With bacterial rot, the plant looks similar to one that has been overwatered. The leaves and stems may wilt, turn yellow, or go mushy. Remove the orchid from its container, wash away the existing medium and repot in clean medium. Then, treat with a copper fungicide spray.
Mealybugs
Mealybugs are little sapsuckers that damage your orchid and leave deposits of honeydew. Your orchid will look like it has little bits of cotton on it. Use neem oil with a little pyrethrum in it for a knockdown effect.
Thrips
Spotty leaves and blossoms that don’t open could be a sign of thrips. I find an insecticidal soap works to control these pests.
Spider Mites
You likely won’t see spider mites because they’re so small. You might see their little webs though. Little yellow or brown spots on the leaves can often be from spider mites. Use neem oil or a miticide, and check out our guide for more tips.
Tips for Beginners Growing Orchids
- Don’t be nervous about growing orchids. You might be surprised at how easy they are to grow.
- Water well.
- Feed regularly.
- Give proper humidity and light.
- Use a medium specific to orchids, not standard potting mix.
- Choose a variety for beginners and use a container.
Other than that, enjoy.
