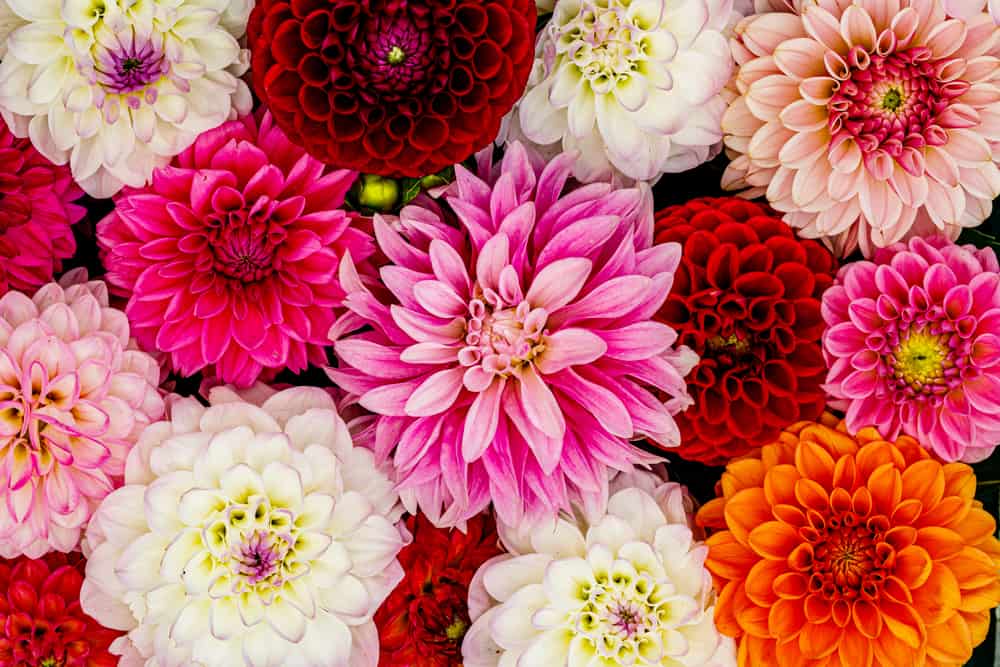
If there is one flower that gets gardeners excited (and competitive), it’s dahlias. The big, bold, and often bright blossoms are some of the most dramatic that you’ll ever see in the garden.
Dahlias make excellent cut flowers, and the tubers are always sought after, especially the trendy types.
If you’ve thought about growing dahlias but have heard they are difficult to grow, I can change your mind.
What Are Dahlias?
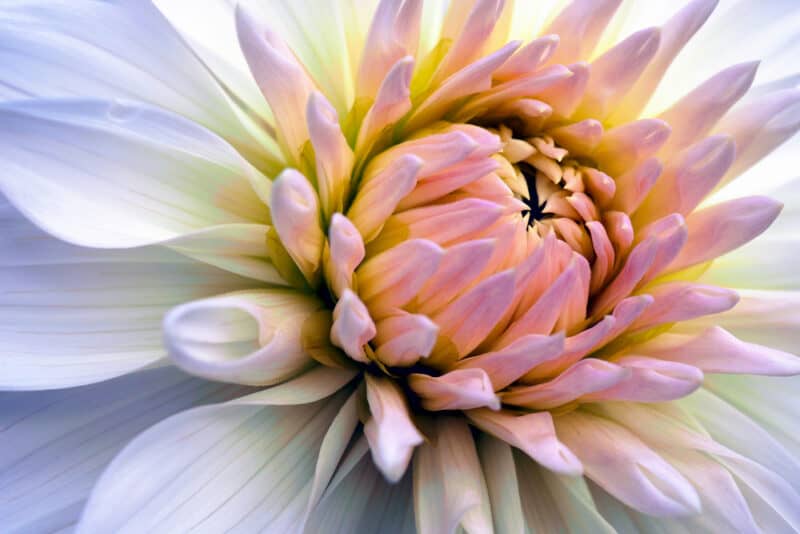
Dahlias (Dahlia spp.) are from the Asteraceae family, which includes sunflowers, zinnia, aster, and daisies.
Originally from Mexico and South America, explorers spread dahlia tubers worldwide as far back as 1570 AD. Today there are over 20,000 cultivars and 30 different species. It is a perennial in warm climates but treated as an annual in cooler areas.
You can find types that grow anywhere from USDA Growing Zones 3-10.
5 of The Best Dahlia Options
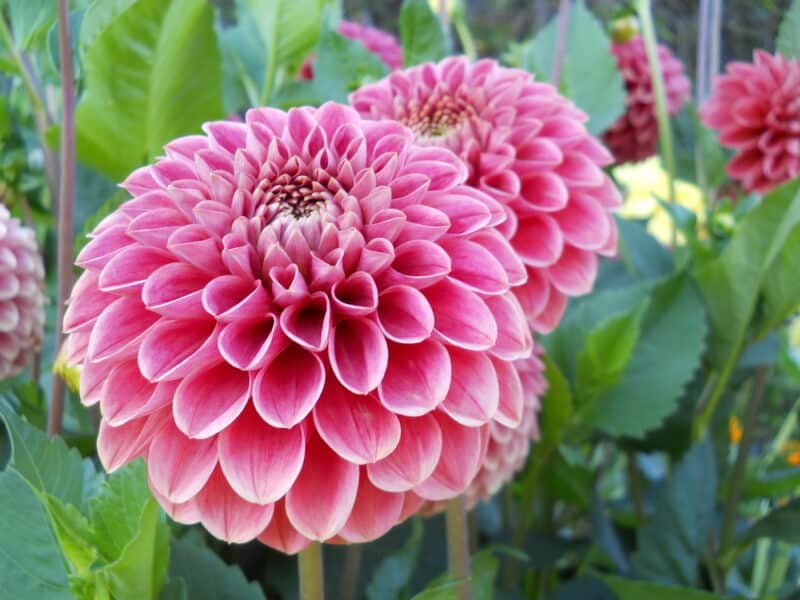
Dahlias are grouped by type: cactus, pompon, semi-cactus, anemone, single, peony, dinnerplate, waterlily, and stellar.
There are so many cultivars, it’s impossible to list them all, so here are a few different types that are always popular and are ones to look out for.
Kelvin Floodlight
This dinnerplate style has huge blossoms up to 10 inches across in a bright yellow color. The blossoms are so big, you will wonder how the stem is holding it up without snapping. The petals are flat and broad, curling up at the tip to give the flower a full-looking pattern.
Cafe Au Lait
This is one of the most popular series in recent years. The dinnerplate-sized blooms come in a blend of pink, white, cream, and yellow. The tubers are smaller than other varieties, but that doesn’t affect the bloom size.
Wizard of Oz
This is one of many beautiful pompon cultivars. These are small, perfectly shaped like pompons on a winter hat. ‘Wizard of Oz’ is bubble gum pink. Slightly more tender than some other varieties, pompon types should be lifted in fall after the first frost in all but Zones 8 and up.
Bonne Esperance
This is a pretty petite pink cultivar with a bloom about one inch across. Dwarf varieties are excellent as border color because they bloom early and keep blooming, so long as you remove spent flowers and any seed pods that form.
Lifestyle
The best way to describe anemone dahlias is they have inner petals surrounded by different-looking outer petals. ‘Lifestyle’ has fluffy yellow inner petals, surrounded by bigger pink petals that curve upwards.
How to Propagate Dahlias
Seeds won’t grow true to the mother plant, and some hybrids might be sterile. Tubers taken from a mother tuber will grow true to the mother plant.
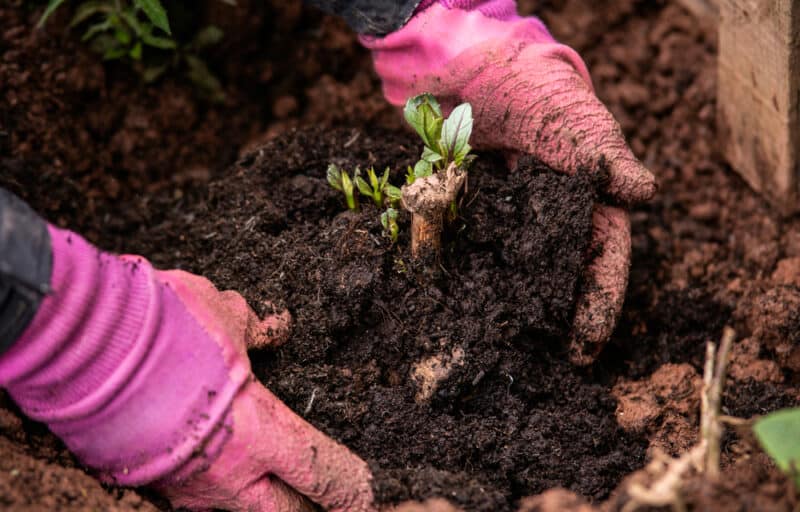
Cuttings From Tubers
First, let’s look at taking cuttings from tubers. Encourage tubers to sprout by bringing them out of storage (or buy them) in early spring in Zones 3 to 7.
In Zones 8 to 11, you should be able to take cuttings from dahlia tubers you’ve left in the ground over winter.
- Take a container and fill 3/4 with potting mix. Some gardeners use other growing mediums, but the potting mix is fine.
- Lay the tuber on its side, making sure the eyes face up. Add more potting mix to cover the tuber, leaving the crown of the tuber above the soil level. This makes it much easier to take the cutting later.
- Keep the container in plenty of light and keep the soil moist but not wet. The crown of the tuber will rot quickly if it’s saturated.
- Once the new growth protruding from the tuber is at least four inches tall, you can take the cuttings. Most tubers have many new bud growths. Each growth should have three sets of leaves, but two will do.
- Cut the new stem just above where it connects to the tuber using sharp scissors. Some people take a little bit of the tuber as well. This is called a heel, but if you don’t take that little bit, the stem cutting grows just as well. Leave the heel on, and the tuber will grow more from that spot.
- Dip in a good quality rooting hormone and plant in a small pot with potting mix or seed-raising soil.
- Within three to five weeks, the cuttings should have formed roots.
- Harden off the cuttings if planting in the garden, or if you are keeping them in containers, replant one per pot.
- A new tuber will form as the cutting grows.
Dividing Tubers
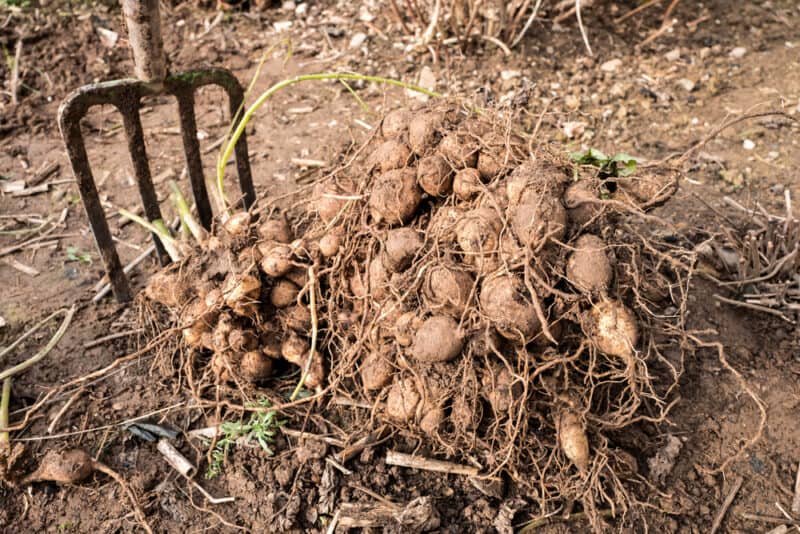
Sometimes a generous dahlia grower will give you a massive bunch of tubers. Or you may dig yours up at the end of the season and need to divide them.
Don’t just jump right in and pull them apart, though. You need three things to divide a tuber so it will grow flowers again successfully.
First, let the tubers overwinter in the ground and split them just before the next growing season starts in spring.
Then, examine the tubers. Each section must have a main body of the tuber, plus a neck, and an eye.
The body and neck are easy to see. The eyes are sometimes small. You may have to look hard. The best way to describe an eye is the spot where a new shoot grows. It’s kind of similar to the eye of a potato.
If you can’t see the eyes, place the tubers in a warm, dry room, and they will begin to swell as the tuber naturally starts to regrow shoots.
Gently snap the tuber off with the eye or cut with a sharp knife to ensure at least one eye on each new tuber. You may end up with two tubers together because there is only one eye between the two.
Once split, plant in pots as described above before transplanting outside later.
Plant Dahlias From Seeds
It’s incredible how one tiny seed can end up as a giant bunch of tubers, all producing their own shoots. Dahlia seeds are easy to collect from your plants, or you can purchase good-quality seeds.
Sow indoors with pots of a seed-raising mix. If you want to plant these outside this season, begin the process six weeks before the last frost.
Plant the seed close to the pot’s side. You can do this on all sides, so you may have four seeds per pot) because you want to encourage tuber growth right from the start.
Keep the soil moist in a sunny indoor position.
Plant new seedlings outside once the soil temperatures reach at least 65ºF.
How to Care for Dahlias
Plant in spring when no more frosts will occur. Soil temperature between 65-70ºF is critical. Start tubers inside on a heat mat if possible.
Soil pH should be around 6.5. Plant in free-draining soil that holds moisture. Plant in raised rows.
Provide six to eight hours of sunlight a day. In warmer areas above zone 8, afternoon shade is beneficial.
Protect from winds with staking because the stems and new growth is very easily damaged. With long rows of dahlias, consider a Florida weave style.
Water deeply twice a week. If you plant tubers with no new growth, don’t water until the growth appears above the soil.
Water more frequently in hot weather that dries soil out.
Dahlias grow well in containers, especially dwarf varieties. Use a container that is at least 12 inches deep, but 16 inches is better.
Fertilizing and Pruning Dahlias
Dahlias like to eat. That’s how they produce so many colorful blooms throughout the entire season.
Feed once every four weeks with a high-phosphorous fertilizer. Purchase a dahlia or flower-specific fertilizer if you can and follow the instructions on the packaging.
High nitrogen fertilizer will cause excessive foliage growth, with fewer blooms.
If you are going to dig up and store tubers over winter, stop feeding the dahlias as the blooms begin to decline in number. Late growth causes rotting issues in stored tubers.
Cut blooms when they are ready to encourage more flowers. Prune off any damaged or diseased sections of the plant.
Best Companion Plants for Dahlias
- Bee balm
- Zinnia
- Aster
- Cosmos
- Snapdragon
- Black-eyed Susan
- Alliums
- Coneflower
- Strawflower
Problems and Solutions for Growing Dahlias
A few different pests and diseases might go after your dahlias. Here are the most common ones to watch for:
Slugs and Snails
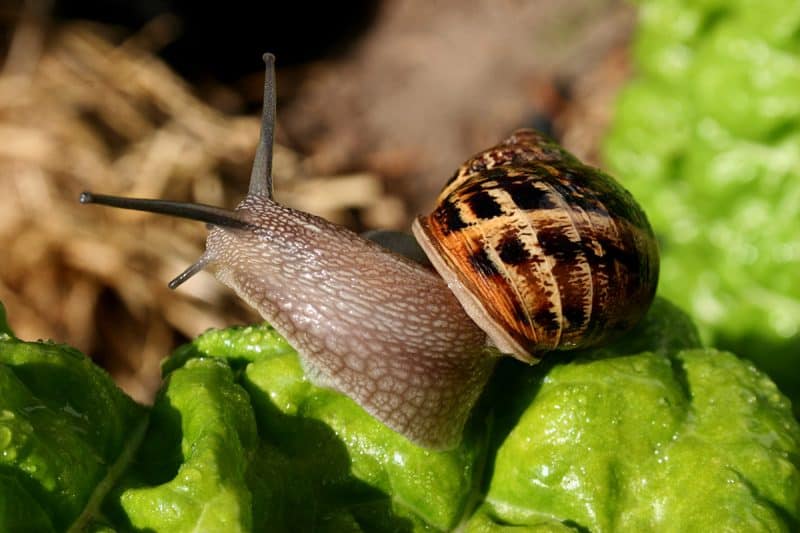
Both of these pests are prolific when the plants are very young. They can decimate dahlias if the numbers grow too big. If you’re patient, go out at night and remove them all. Use snail and slug pellets for better control.
Earwigs
Earwigs seem to take over when the slugs and snails lose interest. They can damage young, tender shoots and stems, causing them to fall over. Use scrunched-up newspaper and when they shelter in it for daylight, remove it and throw it in the garbage.
Some people use petroleum jelly on the stems just above the soil to stop earwigs from eating the plant, but this can cause issues for the plant, especially if it rains heavily. The plant may break at the point where you put petroleum jelly.
Remove any hollow spaces that earwigs might hide in during the day. Hollow edging or bricks with holes in them are two of their favorites.
Aphids
Aphids love dahlias, especially those in greenhouses where the humidity is high. They can badly affect the health of young dahlias, so early control is necessary. Use an organic spray specific to aphids that won’t harm beneficial insects because ladybugs love to eat aphids.
Our guide has tips on natural methods of aphid control.
Caterpillars
These pests can damage the lovely petals of the dahlias, so constant control is necessary. Use a product that contains the beneficial bacteria Bacillus thuringiensis, like Bonide’s Thuricide.
Powdery Mildew
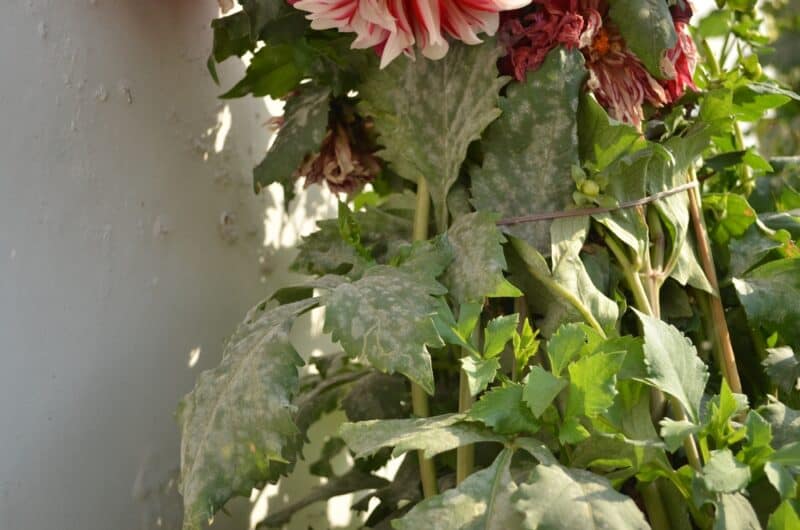
Like roses, dahlias can be infected with powdery mildew. Check out our article on how to avoid and control it.
Bacterial Stem Rot
Stems become blackened and soft and wet inside. They smell rotten. Remove and destroy the plant to prevent spread.
Aster Yellows
Aster yellows is a disease caused by phytoplasma. It’s spread by sap-sucking insects such as thrips, leafhoppers, and aphids.
When this viral-like disease is present, the flowers don’t form properly, and fleshy tissue appears in their place. Also, instead of colorful flowers, the blossoms stay light green.
You must remove and destroy the plant because there is no cure. The best defense is to keep dahlias healthy while controlling pests.
Verticillium Wilt
This is a devastating disease, so read our in-depth article here on how to identify and deal with it.
Dahlia Tuber Storing Tips
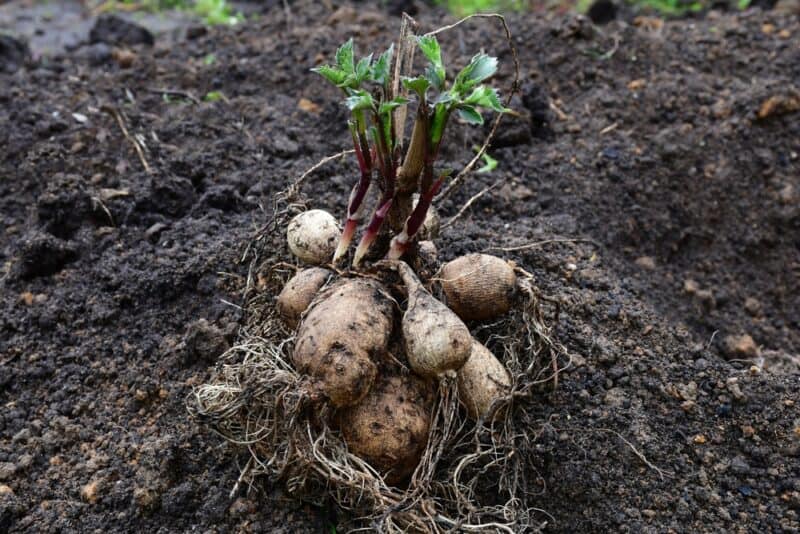
- Wait for the first frost before cutting dahlias back to four inches above the soil.
- Leave for one week.
- Carefully dig the tubers up without damaging them.
- Brush off the excess dirt, but don’t wash with water.
- Air dry the tuber away from direct light in a dry, warm room.
- Store in boxes or bags at around 50ºF.
