We all want to raise happy and healthy chickens, don’t we? However, if you’ve been keeping chickens for a while, you know it’s not always easy to keep your flock healthy. Parasites, diseases, and crop issues in chickens can affect your flock’s health even with the best of management.
Luckily, crop issues in chickens aren’t contagious and are usually a somewhat simple fix. Other problems like parasites and illnesses can jump from one bird to another as soon as you bat an eye, but today we will look only at crop illness and ailments in detail.
Crop Illness – What is it?
First of all, what is the crop? When your chickens have just eaten, do you ever notice a bulge on their chests? If you have, you already know where the crop is and probably have a good idea of what it does.
The crop is located a bit to the right of a bird’s breastbone at the end of their esophagus. If you’ve never seen one before, wait until shortly after feeding time and gently pick up one of your chickens. Feel to the right of its breastbone and you will likely feel a firm pouch.
Locating and feeling a crop to detect any abnormalities isn’t difficult once you know where it is and how a crop works.
1. How Does the Crop Work?
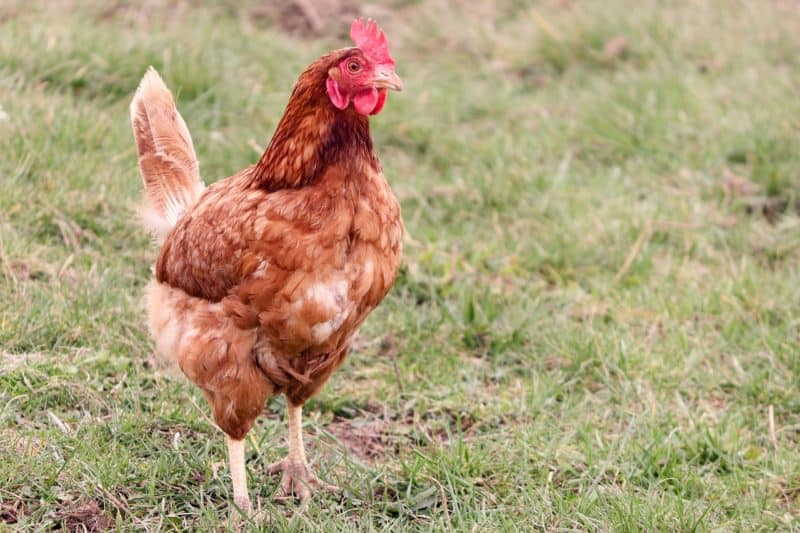
As you may have guessed based on the location, the crop is part of a chicken’s digestive system. When birds eat a large amount of food quickly, the crop enlarges to hold the food while it waits to be digested. When the crop is empty, it contracts into a small pouch that isn’t noticeable until full again.
Healthy crops have a large quantity of good bacteria in them to keep everything running well. When crops are full for an extended period of time after an especially large meal, the good bacteria keeps everything healthy while food waits to be digested.
2. Why Does the Crop Stop Working?
There are many reasons why crops stop working, some of them being somewhat difficult to prevent. Lots of tough vegetation, injury to or near the crop, worms, and infections can all cause a crop to stop working or malfunction. Having a bird on antibiotics can also cause crops to stop working because antibiotics kill all the bacteria in the chicken’s body.
How to Observe Crop Issues
Figuring out that your chicken has a crop issue isn’t too difficult when you know what you’re looking for. The best time to look for a crop ailment is in the morning before your chickens have eaten anything. A healthy crop should empty completely overnight, so if it’s still looking full in the morning then something is likely amiss.
If you notice a full or partially full crop, the next thing you’ll need to do is gently pick up your chicken to figure out what is going on. Always handle affected birds with extreme care, because their crop area may be sore and painful. Gently feel the crop area, put your ear up to the crop and listen closely, and smell the bird’s breath to help identify what you’re working with.
We’ll discuss what you’re looking for when checking a bird out in the next section.
Another thing that is worth noting is the time of year that you’ll most commonly see crop issues in birds. In the springtime when new growth is everywhere, sometimes chickens gorge themselves to the point of sickness.
You won’t see crop ailments in chickens issues exclusively in the springtime, but it’s definitely when many chicken keepers observe an increase in cases.
How to Identify Specific Crop Ailments
1. Impacted Crop
Impacted crops occur most often when your bird has eaten too much large and fibrous food, such as long grass. Other times an impacted crop will occur is when a chicken eats something that they shouldn’t have, such as a piece of plastic that can’t be digested.
When diagnosing an impacted crop, just pay attention to how the crop feels. Sometimes there will be a smaller mass in the crop. In other cases, the entire crop will be large and hard, which is a severely impacted crop.
2. Sour Crop
Sour crop can often be as a result of impacted crops and are pretty much a yeast infection of the crop. If your bird has been on antibiotics recently, it will be more susceptible to sour crop. This is because food is more likely to sit and ferment in the crop with the absence of healthy bacteria.
A sour crop will feel squishy and full, and you may hear gurgling if you put your ear up to the bird’s crop. The chicken’s breath may smell incredibly foul, which is where the name sour crop originated. In especially severe cases, chickens may have a sour-smelling liquid coming out of their crops.
3. Doughy Crop
Doughy crop is less common than sour and impacted crop, but it’s not ridiculously uncommon. A doughy crop will feel like a ball of bread dough in the bird’s crop. Oftentimes, a doughy crop occurs due to a dehydrated crop. Doughy crops can also be caused by a yeast infection.
4. Pendulous Crop
Unfortunately, pendulous crops are the most difficult to treat and often result in the bird needing to be culled. Pendulous crop occurs most in an older chicken when their crop muscles no longer retract once the crop is empty. When a bird has a pendulous crop, they may frequently get sour and impacted crop because a fully expanded crop never completely empties.
Treating Crop Ailments
1. Treating Impacted Crop
First of all, you’ll need to put your bird in solitary confinement with fresh, clean water. Feeding a chicken at this point is useless and counterproductive because you’re dealing with a bird that can’t digest the food it has already eaten.
Some chicken keepers will give their birds a drop of olive oil to help loosen up a blockage, others think this is a terrible idea. In the end, it comes down to what you want to do for your flock. Large and frequent doses of oil are not good for a bird’s health.
However, if you use it once or twice to help loosen a blockage, it may be worth it. Many chicken keepers have reported success using this method. If you do choose to use oil, give it to your bird 10-15 minutes before performing the next step.
You’ll need to carefully massage your chicken’s crop to try to break up the blockage. When massaging an impacted crop, massage in a circular and just barely upwards motion. If the blockage isn’t huge, you should be able to massage the mass apart by repeatedly massaging 3-4 times a day.
If your hen hasn’t improved after 24-48 hours with only water and crop massages, it’s time to get a little more serious. The next step is best performed by a vet, but we’ve all been in money tight situations where a vet visit is the last thing we need. If this is the difference between a chance at life and death, you can attempt surgery on your chicken.
To perform surgery to remove the blockage, you’ll need a towel, disinfectant, a scalpel, tweezers, and ideally two people. Wrap the hen in a towel to restrain her movements, leaving access to the crop area. Have your helper lay the hen on her left side with the head angled upwards.
Remove the feathers around the upper half of the crop bulge. Prepare to make an incision by disinfecting the bare area and your scalpel. Carefully cut a small incision through just the skin, don’t cut into the crop just yet.
Once you’ve cut through the skin, blot away any blood and wait for bleeding to stop before venturing into the crop. Pull the skin away and make a very small cut into the crop, making sure that the incisions don’t line up with each other. Once you’ve made the final cut, now is the time to slowly start removing blockage piece by piece.
This step may take over half an hour depending on how bad the blockage is. Take your time to avoid ripping the crop open, this is not a step you can cut corners on.
Surprisingly, many poultry experts do not recommend suturing the incisions, which does make it easier to handle recovery. When I performed surgery on my Ameraucana hen, I left her incisions open and she healed perfectly.
If you suture the incisions, you absolutely must suture the crop and skin separately. Sewing the crop and skin together would not be a good way to end a surgical endeavor.
Make sure to clean the wounds and put a wound dressing on them daily. Keep healing quarters clean and bedding like cardboard or newspaper so that shavings don’t get on the healing wounds.
For the first 36 hours after surgery, do not give your chicken anything to eat. Provide a small amount of water with VetRx in it to give the bird some a bit of nutrients.
After 36 hours, you can mix one tablespoon of chick starter with one tablespoon of water to make an easily digestible mash. Check the crop to make sure it’s emptying properly after 6 hours. You can give another tablespoon of mash if everything seems to be working well.
This mash will work well for your recovering hen for the first three days, just make sure the crop is consistently emptying.
You can introduce tiny amounts of scrambled eggs after a few days, alternating between eggs and mash every 6 hours, keeping a close eye on the crop. In the next two weeks, you can slightly increase food amounts before transitioning your chicken back to a regular diet.
Make sure to vigilantly check the crop for anything performing incorrectly while your hen gets back to a normal life and diet.
2. Treating Sour Crop
When you have determined that a chicken has sour crop, remove it from the flock and take away food and water for 12 hours. At this point, work on massaging the crop from top to bottom every few hours to try to move the contents to the gut. You can re-introduce fresh water after 12 hours to see how the bird handles this and to observe if the issue has passed.
Feeding your chickens small amounts unsweetened greek yogurt, scrambled eggs, and garlic water is helpful in helping to return the correct bacteria balance to the crop.
If the issue seems to be persisting, you may need to get the liquid out of the crop a different way. Tilting a chicken’s head downward to massage the liquid out should always be a last case resort because this can cause a hen to aspirate and die. If you must attempt to get the bird to expel some of the liquid, make sure to only have her upside down for 15-20 seconds at a time to try to prevent aspiration.
When the hen is turned upside down, gently massage her crop in the direction of her beak. After no more than 20 seconds have passed, turn her back right side up to let her catch her breath. Do not repeat this frequently to minimize the risk of aspiration.
3. Treating Doughy Crop
Doughy crop is less common than impacted and sour crop, but it is quite pesky and annoying for all parties involved. A simple method of treatment has been used by many backyard chicken keepers with satisfactory results.
Combine 1/16 of a teaspoon each of ginger, cayenne, and cinnamon powder in a teaspoon of lemon juice. Using a syringe, slowly get this down the chicken’s throat, keeping the head level to avoid choking the hen. If possible, squirt a bit of the concoction into the bird’s mouth and let it swallow it on its own.
Massage the crop gently upward while keeping the bird in an upright position after every lemon juice treatment, which should occur about 3 times a day. After a few days, the mass should break apart and the crop function should normalize.
4. Treating Pendulous Crop
While you can treat the chicken each time it gets sour or impacted crop because of their pendulous crop, it’s not usually worth your trouble. A consistently ill bird doesn’t have the best quality of life and it’s usually the most humane decision to put the bird down.
If the bird’s condition isn’t too severe, “chicken bras” have been made. Chicken bras aid in holding the crop up closer to the bird’s body so they can digest their food properly. If your bird is a pet chicken, this may be a good option for extending the chicken’s life.
However, for most chicken keepers, bras are more trouble and money than they’re worth. In these cases, the chicken will likely end up in the freezer.
Recovery From Crop Issues
As we covered when discussing treating crop ailments, monitoring diet, and crop function is imperative to making sure your chicken makes a complete recovery. Make sure living quarters remain fresh and clean for any chickens that have been operated and have open wounds.
If your bird has plenty of time and the appropriate diet to recover safely, it should be able to return to the flock in no time.
Preventing Crop Ailments
They say an ounce of prevention is worth a pound of cure, and that one is definitely accurate. Birds that free-range frequently are more likely to encounter crop issues because they have access to more potentially dangerous foods. Keeping grass trimmed and stray objects picked up in the chicken run will aid in preventing crop issues.
Unfortunately, you can’t do anything to ensure that your chickens never have a crop ailment. Luckily, you can attempt to keep the areas clean of potential hazards and reduce their chances of getting sick.
Managing a Healthy Flock
In the end, any flock is susceptible to a myriad of health issues including the crop ailments in chickens we’ve discussed today. Always keep a watchful eye on the appearance and demeanor of your chickens. This will help you to catch any issues before they get too far out of hand.
